What’s Inside
- Choose a Convertible Dresser for Longevity
- Prioritize Safety with Wall Anchors
- Select an Ergonomic Changing Height
- Ensure Adequate Dresser Depth for Changing Pads
- Maximize Drawer Space with Expandable Dividers
- Implement the File Folding Method for Clothes
- Prioritize Non-Toxic and Sustainable Materials
- Consider an IKEA Hemnes Dresser Hack for Customization
- Use Clear Acrylic Trays for Top Storage
- Add a Warm Glow with a Touch Lamp
- Keep a Dedicated Laundry Bin Close
- Utilize the Top Drawer for Immediate Needs
- Install a Floating Shelf Above for Distractions
- Swap Standard Knobs for Leather Pulls
- Add a Wipeable Changing Pad
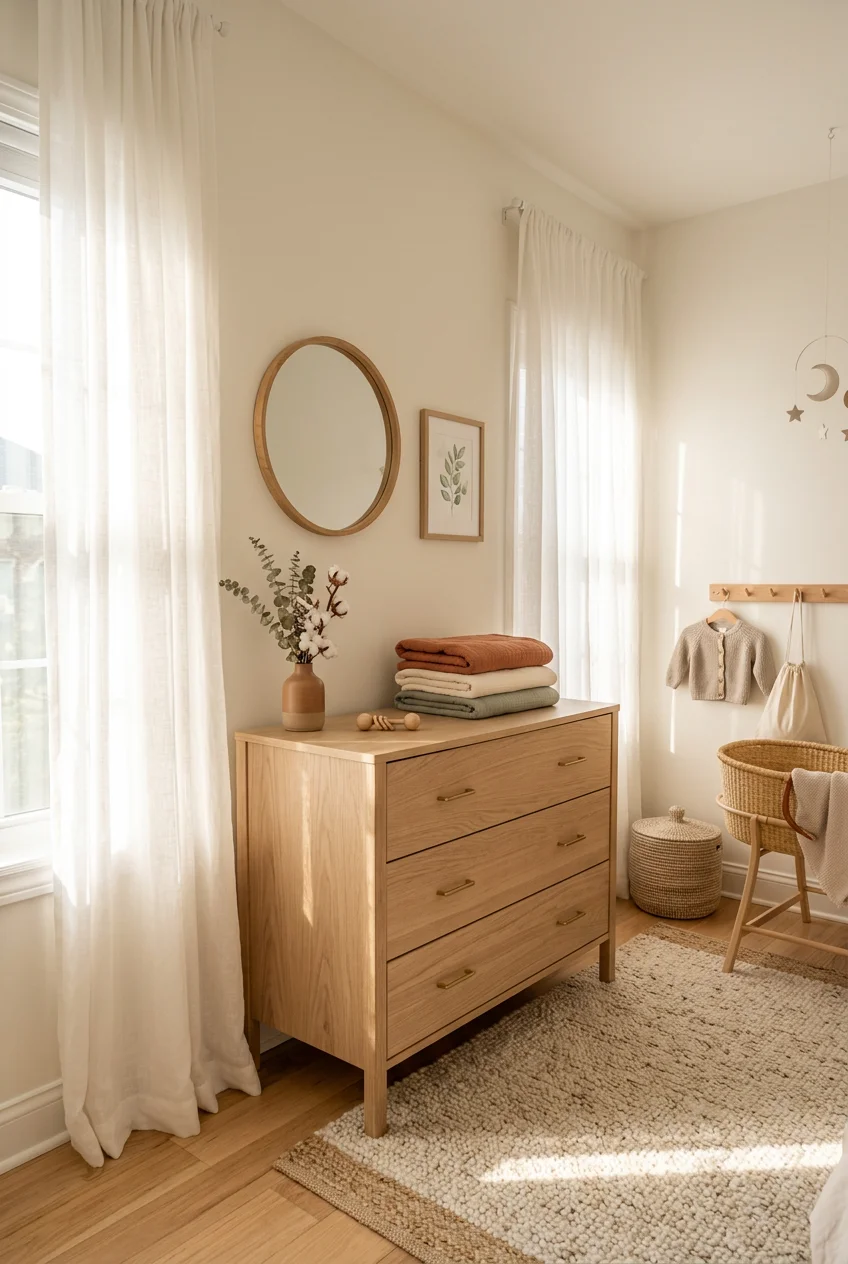
I spent my first week as a mom crying on a cheap rug at 2 AM. I opened two drawers of my flimsy nursery dresser at once, and the whole thing tipped forward, dumping forty newborn onesies and a container of Desitin onto the floor. If you need practical nursery dresser ideas, you have to start with the reality that babies require functional furniture, not just pretty Pinterest setups. I learned that the hard way. My initial setup looked great in photos but failed completely when I actually had a wriggling infant in one hand and a blowout diaper in the other. I spent the next four years testing different setups for my clients and my own kids. Let’s walk through the specific configurations that actually work when you’re exhausted and functioning on three hours of sleep.
1. Choose a Convertible Dresser for Longevity

When I had my first baby, I bought a dedicated changing table that looked like a tiny bookshelf with a pad on top. It cost $150 and became a useless laundry catch-all by month eight. You need a piece of furniture that grows with your kid. Opt for a dresser designed to transition from a changing station to a standard dresser. The Graco Olivia 3-Drawer Dresser with Changing Topper costs between $200 and $300 depending on the finish you pick. It provides deep storage and includes a removable topper. You just unscrew the back brackets when your kid is potty trained, and you’ve got a normal bedroom dresser. I recommend skipping the baby-specific furniture stores and buying a solid convertible piece. I bought a similar model at Target last year for a client, and the wood quality completely surprised me. You get much more value out of a piece that lasts ten years instead of ten months. Plus, a standard dresser holds heavy winter sweaters later on, whereas a flimsy changing table just wobbles under the weight.
2. Prioritize Safety with Wall Anchors

This is a non-negotiable safety measure. Always anchor your dresser to the wall to prevent tip-overs. I mentioned my 2 AM tipping disaster earlier. It was terrifying, and I was lucky my baby was in the crib and not on the floor. You have to secure heavy furniture because toddlers will eventually try to climb the drawers like a ladder. Utilize the anti-tip kits provided with furniture, or purchase aftermarket options. The Pottery Barn Kids Tip Kit is reliable, or you can grab heavy-duty furniture straps at Walmart for $10 to $20 for a pack. Some Graco dressers, like the Sasha and Classic models, feature an interlocking drawer system that only allows one drawer to open at a time. This adds an extra layer of safety. I installed the Walmart straps on a Tuesday afternoon while my toddler napped, and it took exactly twelve minutes with a basic drill. Don’t skip this step. Trust me on this. The peace of mind is worth the tiny holes in your drywall.
3. Select an Ergonomic Changing Height

To prevent back strain during frequent diaper changes, choose a dresser that’s comfortably tall for you. I spent six months hunching over a low mid-century credenza and ended up needing physical therapy for my lower back. Experts recommend a height between 30 and 34 inches for optimal comfort if using it as a changing table. For taller parents over 6 feet, a dresser around 40 to 43 inches is much better. Shorter parents under 5’4″ usually prefer 36 to 38 inches. You can determine your ideal height by standing straight, bending your elbows to 90 degrees, and measuring from the floor to your forearms. I’m 5’6″, and my current setup is exactly 36 inches high. It keeps my wrists straight when I’m wiping a messy baby. If you buy a dresser that’s too low, you’ll feel it in your lumbar spine by day three. Measure your own body before you look at furniture dimensions online.

Criusia Drawer Organizer Clothes
A dependable everyday pick — Criusia Drawer Organizer Clothes pulls in 1 ratings at 4.5 stars. Not flashy, just solid.
4. Ensure Adequate Dresser Depth for Changing Pads

I bought a gorgeous vintage dresser from a local flea market for my second baby. It was painted a beautiful sage green, but it was only 17 inches deep. A standard changing pad typically measures 16 inches wide by 32 inches long. Once I added the contoured pad, it hung off the front edge by a full inch. It looked terrible and felt incredibly unsafe when my baby started rolling. If you plan to use the dresser as a changing station, ensure it has a minimum depth of 20 inches to securely accommodate the pad. This prevents dangerous overhang and provides a stable surface. You also need that extra three or four inches behind the pad to store a small basket of diapers or a wipes dispenser. I ended up selling that vintage piece on Facebook Marketplace and buying a 22-inch deep solid wood dresser from Costco for $399. The extra depth makes a massive difference when you’re trying to keep a squirming infant safe on a high surface. You might also like: 18 Baby Girl Nursery Ideas Worth Trying
5. Maximize Drawer Space with Expandable Dividers

Baby clothes are tiny and can easily become a jumbled mess. A drawer full of newborn socks and mittens looks like a fabric salad after two days. Invest in expandable drawer dividers to categorize and separate clothing sizes and types. I use the OXO Tot Expandable Drawer Dividers. A 4-pack typically costs around $20 to $30. They have a strong spring mechanism that holds them tightly in place, unlike the cheap plastic ones that slide around every time you open the drawer. You just compress them, slide them in, and release. I set up three vertical rows in my top drawer: one for short-sleeve onesies, one for long-sleeve onesies, and one for pants. These dividers are adjustable and can be repositioned as your baby’s wardrobe changes. When my son moved into 2T clothing, I just slid the dividers a few inches wider to accommodate the bigger folded shirts. It takes five minutes to set up and saves you hours of digging for a matching pair of socks in the dark. You might also like: 20 Cozy Gender Neutral Baby Nursery Decor Ideas for Any Style
6. Implement the File Folding Method for Clothes

Instead of stacking clothes in tall piles, use the file folding method for onesies, pajamas, and other small garments. This is also known as the KonMari method. When you stack baby clothes, you end up pulling a shirt from the bottom of the pile, and the whole stack falls over. I used to do this and my drawers were a disaster zone. File folding allows you to see every item at a glance. You fold the item into a small rectangle and stand it upright. This makes it easier to find what you need without rummaging, and it keeps drawers tidy. I learned this technique while eating a bag of Trader Joe’s peanut butter pretzels and watching organizing videos on YouTube. It took me years to figure out that the trick is folding the sleeves inward first, then folding the garment in thirds. Once you get the hang of it, you won’t ever go back to stacking. It doubles your usable drawer space. You might also like: 16 Baby Nursery Themes That Actually Work

Criusia Over the Door Organizer
Criusia Over the Door Organizer has been one of the most consistently praised picks in this category. 218 reviewers averaged 4.5/5.
7. Prioritize Non-Toxic and Sustainable Materials

I once bought a cheap composite wood dresser online. When I opened the box, the chemical smell was so strong it gave me a headache. That’s off-gassing, and you don’t want your newborn breathing it in. Parents are increasingly seeking furniture made from safe, eco-friendly materials. Look for dressers that are GREENGUARD Gold certified, indicating low chemical emissions. Brands like Babyletto, Oeuf, Bloom, and Nestig are known for using sustainable wood sources and low-VOC finishes. I bought the Babyletto Lolly 3-Drawer Dresser for $399. It had zero smell right out of the box. I even bought a natural wood cleaner at Whole Foods for $6.99 to wipe it down, keeping the whole process chemical-free. Yes, solid wood and certified materials cost more upfront. But cheap particle board sags under weight and releases volatile organic compounds into your small nursery space. If you’re on a tight budget, look for used solid wood furniture at thrift stores instead of buying new, cheap composite wood. A twenty-year-old solid oak dresser has already finished off-gassing and is perfectly safe.
8. Consider an IKEA Hemnes Dresser Hack for Customization

The IKEA Hemnes 3-drawer dresser costs around $229 and is a massively popular, budget-friendly option. It stands at approximately 38 inches tall, making it a highly suitable height for a changing table. I bought one in white stain last year. Out of the box, it looks a bit plain. You can customize it with a fresh coat of low-VOC paint, unique brass knobs, or decorative wood beads to create a personalized, high-end look. I swapped the standard black metal knobs for half-moon brass pulls I found on Amazon for $18 a pack. It completely changed the aesthetic. One mistake people make is not sanding the Hemnes before painting. The factory finish is slick. You have to scuff it up with 120-grit sandpaper and use a gripping primer like Zinsser BIN before you apply your color. I skipped the primer on my first attempt, and the green paint peeled off in strips when my fingernail caught it. Do the prep work, and you get a custom piece for under $300.
9. Use Clear Acrylic Trays for Top Storage

The top of your nursery dresser gets cluttered fast. You need diaper cream, lotion, a thermometer, and nail clippers within arm’s reach. I tried keeping these loose on the dresser top, and they constantly rolled off onto the floor. I bought a Sorbus Acrylic Organizer for $14.99 on Amazon. It measures 13 by 9 inches and has small compartments. This tray holds everything securely. The clear acrylic means you can see exactly where the tiny tube of Aquaphor is without digging. Acrylic is also completely waterproof. Diaper creams are greasy and will stain a wood dresser top permanently if they leak. I had a tube of zinc oxide cream explode last Tuesday, and because it was in the acrylic tray, I just rinsed the tray in the sink with hot water and Dawn dish soap. If that had happened directly on the wood, I’d have a permanent white grease stain. Protect the surface of your dresser with a simple, washable tray.

Delta Children Nursery Storage 48 Piece Set
A dependable everyday pick — Delta Children Nursery Storage 48 Piece Set – Easy Storage/Organizatio pulls in 17 ratings at 4.5 stars. Not flashy, just solid.
10. Add a Warm Glow with a Touch Lamp

You need a light source on the dresser for middle-of-the-night diaper changes. Turning on the overhead bedroom light will wake your baby fully, and it’ll take you two hours to get them back to sleep. I use the Hatch Rest+ on my dresser. It costs $89.99 and acts as a sound machine and a nightlight. You just tap the metal ring on top to turn it on. I keep it set to a dim red or orange glow. Red light doesn’t disrupt melatonin production, so it keeps both you and the baby in a sleepy state. I used to use a standard table lamp with a switch on the cord. Fumbling for a tiny plastic switch in the dark while holding a crying infant is incredibly frustrating. The touch feature on the Hatch is functional and easy. It takes up very little space on the dresser surface, leaving you plenty of room for the changing pad and your wipes dispenser.
11. Keep a Dedicated Laundry Bin Close

When a diaper blowout happens, you can’t walk across the room to throw the ruined clothes in a hamper. You need a laundry bin directly next to the dresser. I bought a Pehr Canvas Bin for $45. It’s 18 inches tall and fits perfectly in the narrow gap between my dresser and the wall. Having it right there means I can strip the baby, drop the dirty clothes straight into the bin, and get a clean outfit from the drawer without ever taking my hand off the baby. I initially kept my hamper in the closet. I ended up leaving dirty onesies on the floor next to the dresser for days because I was too tired to walk them over. I even grabbed a cheap plastic bin at Kroger for $8 while buying groceries just to hold me over until the canvas one arrived. Get a bin that has a wipeable interior lining. Sometimes wet clothes sit in there for a day or two before you run a wash cycle, and a plain fabric bin will absorb the moisture and start to smell like mildew.
12. Utilize the Top Drawer for Immediate Needs

The top drawer of your nursery dresser should only contain items you need while your hands are busy. I reserve my top drawer strictly for diapers, wipes, burp cloths, and extra changing pad covers. I use WaterWipes, which cost about $17 for a 4-pack at Target. I take them out of the plastic packaging and put them in an OXO Tot Perfect Pull Wipes Dispenser for $22.99. The dispenser has a weighted plate, so when I pull one wipe, I only get one wipe. Before I bought the dispenser, I’d pull a wipe from the crinkly plastic pack and five would come out at once. I’d be shaking my hand trying to drop the extras while holding my baby’s legs up. Put the dispenser right in the top drawer or on top of the dresser. Keep your backup diapers lined up in the top drawer so you never run out mid-change. Put the cute shoes and seasonal outfits in the bottom drawers where they belong.

Vailando 6-Shelf Hanging Closet Organizer with 3 Drawers
If you want something that just works, Vailando 6-Shelf Hanging Closet Organizer with 3 Drawers is a safe bet (35 reviews, 4.5 stars).
13. Install a Floating Shelf Above for Distractions

Around five months old, babies realize they can roll over. Diaper changes become a wrestling match. You need a distraction. I installed a Target Project 62 Floating Shelf for $25 about 30 inches above the dresser top. I placed a small, colorful wooden toy and a high-contrast art print on it. When my baby starts fighting a diaper change, I just point to the shelf and hand him the toy. It buys me the thirty seconds I need to fasten the diaper tabs. Don’t hang heavy framed art directly over the changing pad. I made this mistake in my first nursery. I hung a heavy glass frame with wire. A door slammed, the frame rattled, and I realized how dangerous it was. If it fell, it’d land right on the baby. Use a lightweight floating shelf and only put soft or lightweight items on it. It draws their eye upward and keeps them still without adding a safety hazard to your setup.
14. Swap Standard Knobs for Leather Pulls

Metal dresser knobs look nice, but they’re painful when your toddler inevitably runs into them. When my son started walking, he was exactly the height of the bottom drawer knobs on our dresser. After he bumped his forehead on a hard brass knob twice in one week, I decided to change them. I bought soft leather pulls from a seller on Etsy for around $3.50 each. They attach with a single screw and fold over into a loop. They’re completely soft, so if a toddler trips and hits the drawer, there’s no sharp metal to cause a bruise. Leather pulls also give a standard dresser a modern, textured look. The leather softens and ages beautifully over time. Just make sure you measure the distance between the holes if you’re replacing two-hole handles. I ordered the wrong size the first time and had to wait two weeks for the replacements to arrive. Measure twice, order once.
15. Add a Wipeable Changing Pad

Traditional foam changing pads require fabric covers. Fabric covers get ruined by poop and pee constantly. I spent the first three months of motherhood doing laundry every single day just to wash changing pad covers. I finally bought a Keekaroo Peanut Changer for $149. It’s made of a solid, impermeable polyurethane material. It feels slightly squishy but completely blocks liquids. When a mess happens, you just wipe it down with a Clorox wipe or a wet paper towel. You don’t have to take a cover off, wash it, dry it, and put it back on. The Keekaroo is heavy and grips the top of the dresser, so it doesn’t slide around. It’s expensive for a changing pad, but when you factor in the cost of buying three fabric covers and waterproof liners, the price difference narrows significantly. I bought mine at Sprouts during a random baby pop-up event, but you can find them at most major retailers. The solid surface saves you endless hours of laundry. No exaggeration.
Setting up a nursery is overwhelming, but your dresser is the workhorse of the room. If you focus on safety, height, and smart storage, you’ll save yourself a lot of physical strain and mental stress. I recommend starting with a solid convertible dresser and the OXO dividers. Those two things alone will solve half your organization problems. Save this post and pin your favorite nursery dresser ideas for later when you’re ready to start building furniture. You’ve got this.
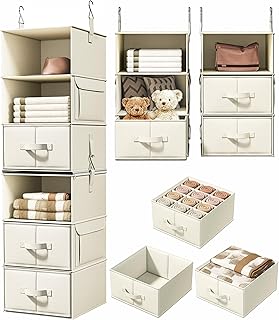
Vailando 6-Shelf Hanging Closet Organizer with 3 Drawers
Vailando 6-Shelf Hanging Closet Organizer with 3 Drawers punches above its price — 35 buyers rated it 4.5 stars. I would buy it again.
Frequently Asked Questions
What is the best height for a nursery dresser?
The ideal height for a nursery dresser used as a changing table is between 30 and 34 inches for most parents. Taller parents over 6 feet should look for dressers around 40 to 43 inches to prevent back strain.
How deep should a nursery dresser be?
A nursery dresser should be at least 20 inches deep to safely accommodate a standard changing pad, which is typically 16 inches wide. This prevents the pad from overhanging the edge.
How do you organize baby clothes in a dresser?
Use the file folding method to stand clothes upright so you can see everything at once. Invest in expandable drawer dividers to separate items by size and type, keeping tiny socks and onesies organized.
Is it safe to put a changing pad on top of a regular dresser?
Yes, it’s safe as long as the dresser is deep enough (at least 20 inches), the changing pad is secured to the back with straps, and the dresser is properly anchored to the wall to prevent tip-overs.
