What’s Inside
- Prioritize Safety with Shatterproof Materials
- Master the 2/3 to 3/4 Proportion Rule
- Nail the Exact 8 to 10-Inch Hanging Height
- Space Gallery Walls with Mathematical Precision
- Lean Into 2026’s Minimalist Pastel Trends
- Stop Buying Art That is Visually Too Small
- Secure Everything with Multi-Point Anchoring
- Add Interactive Elements for Tactile Development
- Print DIY Mockup Nursery Wall Art at Home
- Match Visual Stimulation to the Baby’s Age
- Anchor the Room with Personalized Name Banners
- Build a 4-Inch Gravity Corridor Behind the Crib
- Mix 3D Textures Instead of Flat Prints
- Source Eco-Friendly Paints and Sustainable Canvas
- Map the Layout with Painter’s Tape First
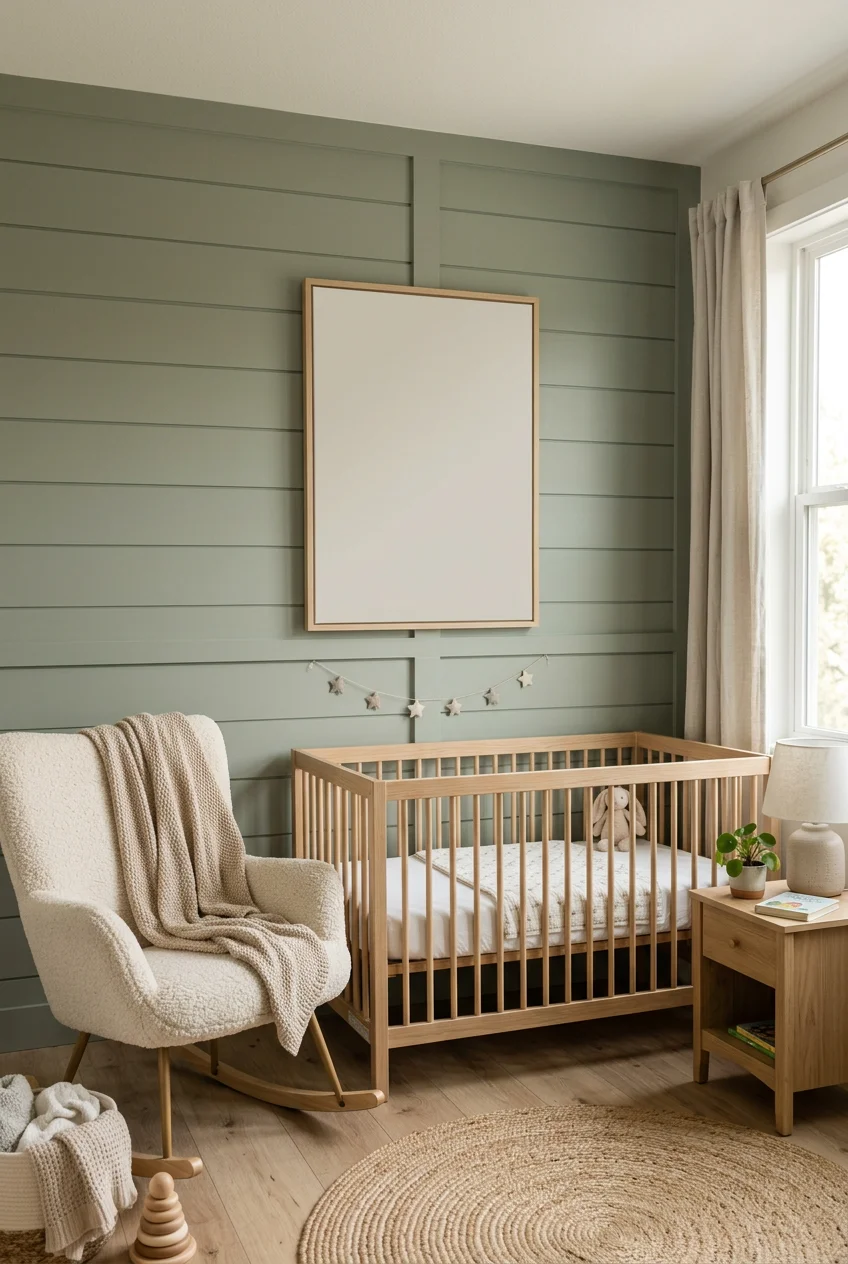
Most people hang heavy, glass-fronted frames right over a crib and wonder why the room feels like a hazard. Nailing your mockup nursery wall art isn’t just about picking cute animals or trendy fonts. It’s about proportion, safety, and visual weight. Too many nurseries end up with tiny, floating prints that look disconnected from the furniture below. You’re dealing with a space where safety rules dictate your design. If you only try one idea from this list, make it #7. Here’s why: securing art with multi-point anchoring prevents middle-of-the-night disasters, which is the only thing that actually matters when designing a baby’s room. You might also like: 16 Toddler Room Inspiration for Every Budget
Skip this list if you’re outfitting a temporary space for less than three months or if your landlord forbids even a single thumbtack hole. These methods require proper hardware, precise measurements, and a willingness to commit. You can’t achieve a safe nursery gallery wall with just sticky tack and wishful thinking. Trust me on this. You might also like: 16 Baby Nursery Themes That Actually Work
1. Prioritize Safety with Shatterproof Materials

Hanging traditional glass directly above a crib or changing table is a rookie mistake. One slammed door or heavy footstep upstairs can send a glass pane crashing down. Look for frames with acrylic or plexiglass fronts, wrapped canvas, or printed fabric signs. The clarity of high-quality acrylic is basically the same as glass, minus the risk. Brands like Effie Row offer custom framing options where upgrading to plexiglass over standard glass runs about $10 to $15 extra per frame. It’s a small price for peace of mind. When you’re picking up basic frames during a Target run, tap the front panel. If it makes a sharp, high-pitched clink, it’s glass. If it sounds dull, it’s plastic. You want the dull sound. Even budget-friendly frames usually offer a styrene or acrylic option now. The catch: acrylic scratches easily, so you can’t wipe it down with paper towels or abrasive cleaners without leaving permanent swirls.
2. Master the 2/3 to 3/4 Proportion Rule

Best for: large empty walls
Walking into a nursery with a tiny 8×10 print floating alone above a massive dresser looks jarring. The scale is off. When hanging mockup nursery wall art above large furniture, the artwork or the grouping should span at least two-thirds to three-quarters of the furniture’s width. Let’s do the math. A standard crib is around 52 inches wide. That means your art arrangement needs to be between 35 to 39 inches wide to create balance. If you’re hanging a single piece, a large 36×48 inch canvas works. If you’re using multiple frames, calculate the total width including the spacing. You can find oversized canvas prints at places like Walmart or online retailers, usually priced between $70 and $150 depending on the frame. The catch: finding a single, cohesive piece of art that spans exactly 39 inches is difficult, so you’re often forced into designing a multi-frame gallery wall.
3. Nail the Exact 8 to 10-Inch Hanging Height

Most people hang these too high and wonder why the room feels off. Art that sits two feet above a dresser looks like it’s floating away. Position the bottom edge of your wall art exactly 8 to 10 inches above the top edge of the furniture it’s placed over. This measurement ensures the artwork feels anchored to the crib or changing table, creating a cohesive unit rather than two separate elements fighting for attention. Grab a 25-foot tape measure and mark the 8-inch line with a pencil. When shopping for nursery furniture at stores like Crate & Kids, look at the display vignettes. They follow this 8-inch rule. A standard framed print from a mid-tier brand typically runs between $40 and $90. The catch: if your dresser has a removable changing topper, you have to measure the 8 inches from the top of the changing tray, not the dresser, which pushes the art higher than you might have planned. I learned that the hard way.
CUBEDIY Baby Closet Organizer for Nursery: Durable Baby
CUBEDIY Baby Closet Organizer for Nursery: Durable Baby Wardrobe for C has been one of the most consistently praised picks in this category. 342 reviewers averaged 4.5/5.
4. Space Gallery Walls with Mathematical Precision

Best for: homes with high ceilings
Eyeballing the distance between frames is a guaranteed way to make your nursery look sloppy. For a gallery wall to look intentional, keep a consistent spacing of exactly 2 to 3 inches between every frame. This tight spacing prevents the wall from appearing cluttered. When frames are spaced 5 or 6 inches apart, the eye reads them as isolated objects rather than a collection. If you’re buying a bulk pack of frames from Costco, which usually sit in the budget to mid-range price bracket, use a scrap piece of wood cut to exactly 2 inches wide as a spacer. It’s faster than using a tape measure for every gap. Just hold the wood block against the first frame and butt the second frame against it. The catch: measuring exactly 2 inches between eight different frames requires serious math, and one misplaced nail ruins the alignment.
5. Lean Into 2026’s Minimalist Pastel Trends

Primary colors are loud and exhausting in a room meant for sleeping. The 2026 design consensus leans into soft botanical and minimalist pastel themes. These palettes offer a calm, timeless look that doesn’t scream ‘baby room’ and can grow with your child. Look for muted tones like sage green, warm beige, dusty pink, or soft terracotta. Independent artists on platforms like Society6 or Etsy sell digital downloads of these colors, typically under $15 for the file. You get the soft textures without the clutter of cartoon characters. It’s a sophisticated approach to mockup nursery wall art that feels intentional. The catch: trendy muted pastels often look washed out and muddy in north-facing nurseries that don’t get enough natural light.
6. Stop Buying Art That is Visually Too Small

A frequent error is choosing art that is simply too small. A single 11×14 print on a blank 10-foot wall looks ridiculous. Designers agree that slightly too big is always better than slightly too small. For medium-sized walls, you need larger prints. A 24×36 inch poster or a grouped set of three 18×24 inch frames creates the visual weight to ground the room. When you scale up the art, the room feels larger and more deliberate. Large-format prints from boutique brands usually fall into the mid-range price tier, but the impact is worth it. Don’t be afraid to let the art dominate the wall. The catch: custom framing for anything larger than 24×36 inches is expensive, often costing triple the price of the art itself.

Criusia Drawer Organizer Clothes
Criusia Drawer Organizer Clothes punches above its price — 12 buyers rated it 4.5 stars. The kind of pick people reorder.
7. Secure Everything with Multi-Point Anchoring

Best for: homes with active toddlers
Hanging art on a single nail in a nursery is negligent. You need secure, multi-point anchoring to prevent a frame from swinging, shifting, or falling if a toddler throws a toy at it. Use heavy-duty hanging hardware like metal French cleats or double D-rings at the top of the frame. Then, stabilize the bottom two corners with earthquake putty, industrial Velcro, or 3M Command strips. This locks the artwork flat against the drywall. It won’t budge, even if you bump the wall. You can pick up a pack of large Command strips during a Costco or Target trip for under $20. The tactile snap of the Velcro tells you it’s secure. The catch: earthquake putty often leaves a greasy residue on flat or matte paints, forcing you to repaint the spot if you move the art.
8. Add Interactive Elements for Tactile Development

Flat paper prints are fine, but interactive wall art serves a dual purpose. Incorporating tactile fabric wall hangings, large chalkboard posters, or oversized magnetic maps offers developmental stimulation. It encourages touch and motor skill development once the baby starts standing in the crib. A thick, tufted wool wall hanging introduces a cozy texture that flat canvas can’t replicate. You can find beautiful, hand-woven macrame or felted animal shapes from specialty decor shops, usually ranging from mid-tier to premium prices. It breaks up the monotony of standard frames and gives the baby something to focus on. The catch: highly textured fabric hangings and wool pieces collect dust aggressively and are difficult to clean without ruining the fibers.
9. Print DIY Mockup Nursery Wall Art at Home

Best for: tight budgets
You don’t have to spend a fortune on custom prints. Creating personalized, budget-friendly art using free design platforms like Canva is realistic. You can design custom typography, select hex codes to match your crib sheets, and export the file in high resolution. The secret is the paper. Standard printer paper looks cheap and wrinkles. You need a heavy, premium stock like Koala Brand’s 66 lb double-sided matte photo paper. It absorbs ink beautifully, giving you a professional finish that mimics expensive prints. A pack of 100 sheets is under $25. You get custom mockup nursery wall art for pennies on the dollar. The catch: home printer ink is expensive, and printing large blocks of solid color will drain your cartridges fast, potentially negating the savings.

Beautiful Wooden Baby Closet Dividers Set of 7
Beautiful Wooden Baby Closet Dividers Set of 7 – Double-Sided Organize is sturdier in person than the photos suggest — over 11 buyers gave it 4.5 stars.
10. Match Visual Stimulation to the Baby’s Age

Newborns don’t care about your sophisticated dusty pink palette. For the first 0 to 3 months, babies primarily see in shades of black, gray, and white. Prioritizing high-contrast, geometric black and white patterns next to the changing table aids their visual development and gives them something to focus on during diaper changes. As they grow into the 4 to 12-month range, you can swap those prints for soft colors and simple images like baby animals or nature scenes. Art sets that feature swappable cards or modular frames are perfect for this transition. They usually sit in the budget-friendly price range. The catch: stark black and white geometric prints clash with traditional, soft nursery decor, forcing a very specific modern aesthetic on the room.
11. Anchor the Room with Personalized Name Banners

Generic art lacks emotional depth. Personalized art, such as custom typography name prints or sewn initial banners, adds a unique touch. It identifies the space. Brands like Minted and Cherie Kay offer excellent personalized options, including heavy canvas or fabric wall hangings starting around $40. The texture of a stitched fabric banner feels higher-end than a flat printed poster. It acts as a natural focal point, usually centered over the crib or the main reading chair. The catch: custom name prints are locked to that specific child, meaning you’ve got no way to reuse the expensive artwork for a second baby unless they share the same name.
12. Build a 4-Inch Gravity Corridor Behind the Crib

Best for: anxious parents
If you insist on hanging heavier art near the crib, you must establish a gravity corridor. This is a 4-inch physical gap between the back of the crib and the wall. If a piece of art were to fail and fall, this gap nullifies the risk. The object drops straight down into the void, landing harmlessly on the floor between the crib and the baseboard, rather than deflecting into the crib. It’s a simple physics solution to a common safety anxiety. Just pull the crib forward. The catch: pulling a bulky crib 4 inches off the wall eats up floor space in a tiny nursery and often looks awkward from the doorway.

Criusia Over the Door Organizer
If you want something that just works, Criusia Over the Door Organizer is a safe bet (336 reviews, 4.5 stars).
13. Mix 3D Textures Instead of Flat Prints

A wall covered in flat, glass-fronted frames feels cold and clinical. Break up the visual plane by incorporating varied textures and three-dimensional elements. Think thick felt pennants, woven rattan animal heads, or chunky wooden bead banners. The contrast between a smooth acrylic frame and a rough, natural wood element gives the mockup nursery wall art depth. You might pick up natural beeswax at Sprouts to polish a raw oak frame, adding a subtle honey scent and a rich matte finish to the wood. Mixing these materials prevents the room from looking like a sterile catalog. The catch: oversized 3D elements like woven animal heads cast weird, spooky shadows on the walls at night when lit only by a dim lamp.
14. Source Eco-Friendly Paints and Sustainable Canvas

Nurseries are small, enclosed spaces where babies spend up to 16 hours a day. Off-gassing from cheap synthetic canvases and toxic printer inks is a real issue. Opt for eco-friendly wall art made from sustainable materials like recycled paper, organic cotton, or prints that use non-toxic, water-based inks. Brands like Oopsy Daisy offer excellent eco-friendly canvas options, while companies like Little Greene provide zero-VOC paints and wallpapers made from sustainable forests. These products usually fall into the premium price range, but they ensure you aren’t introducing unnecessary chemicals into the baby’s environment. The catch: zero-VOC paints and organic inks often lack the bright, vibrant color saturation of their chemical-heavy counterparts, resulting in a slightly duller finish.
15. Map the Layout with Painter’s Tape First

Best for: beginners
Hammering nails into fresh drywall without a plan is a disaster. Designers emphasize that the most common mistake is skipping the mapping phase. You need a roll of standard blue painter’s tape—grab a 1.88-inch roll during your next grocery run for a few bucks. Cut the tape to the exact dimensions of your frames and stick them to the wall. This allows you to step back, check the 8-inch height rule, verify the 2-inch spacing, and see the exact visual weight of your mockup nursery wall art before you make a single permanent hole. No exaggeration. The catch: cheap painter’s tape will still peel the top layer off fresh nursery paint if you leave the tape squares up for more than a few days before hanging the actual art.
How we chose these ideas: We selected these nursery wall art strategies based on safety protocols, renter-friendliness, and visual impact. We prioritized methods that require minimal tools while focusing on proper proportions and secure hardware. Cost and effort were also weighed to ensure a mix of budget DIYs and worthwhile premium investments.
Getting the nursery art right means balancing aesthetics with rigid safety rules, but the result is a room that feels intentionally designed and secure. Don’t settle for tiny, floating frames. Pin this list for your next weekend project, and start mapping out that gallery wall with painter’s tape today.

Vailando 6-Shelf Hanging Closet Organizer with 3 Drawers
If you want something that just works, Vailando 6-Shelf Hanging Closet Organizer with 3 Drawers is a safe bet (35 reviews, 4.5 stars).
Frequently Asked Questions
How high should I hang nursery wall art above a crib?
Position the bottom edge of the artwork exactly 8 to 10 inches above the top rail of the crib. This specific height anchors the art to the furniture visually, preventing it from looking disconnected or floating too high on the wall.
What is the safest material for mockup nursery wall art?
Always opt for shatterproof materials like acrylic or plexiglass instead of traditional glass. Wrapped canvas, printed fabric banners, and lightweight wooden signs are also excellent, safe alternatives that eliminate the risk of shattered glass near the baby.
How wide should art be compared to the nursery dresser?
Follow the 2/3 to 3/4 rule. The artwork, or the total width of a gallery grouping, should span at least two-thirds to three-quarters of the dresser’s width to maintain proper visual balance and scale in the room.
How do I secure wall art in a toddler’s room?
Use multi-point anchoring. Hang the frame using sturdy D-rings or a French cleat at the top, and secure the bottom two corners to the wall using earthquake putty, industrial Velcro, or Command strips so the frame cannot swing or fall.
