What’s Inside
- Prioritize Non-Toxic and Low-VOC Options
- Embrace 2026 Trends With Muted Pastels
- Try “Wallpaper Drenching” for an Immersive Feel
- Opt for Peel-and-Stick for DIY Ease
- Accurately Calculate Rolls to Avoid Shortages
- Don’t Skip Wall Preparation
- Invest in Quality Tools for Flawless Installation
- Match Patterns Meticulously for a Seamless Look
- Consider Fabric Baby Girl Nursery Wallpaper for Texture
- Choose Washable or Scrubbable Wallpaper
- Select a Subtle Pattern Scale for Smaller Rooms
- Use Methyl Cellulose Paste for Traditional Paper
- Allow Freshly Painted Walls to Cure Completely
- Personalize with Customizable Color Options
- Consider Professional Installation for Complex Designs
- Layering Decals Over Solid Baby Girl Nursery Wallpaper
Last Tuesday at Target, I found myself sitting on the cold linoleum floor of the baby aisle, peeling a crusty, dried banana sticker off my favorite jeans. I was staring blindly at a horribly bubbled, cheap wall decal I’d just bought for a client’s room, feeling totally defeated. That specific, embarrassing disaster is exactly why finding the perfect baby girl nursery wallpaper is a brutal process if you aren’t prepared for the realities of home decor. Most people buy the very first cute floral print they see on Pinterest. They don’t think about the harsh chemical smells, the peeling corners, or the absolute nightmare of matching intricate seams while balancing on a wobbly step stool. I’ve ruined perfectly good drywall because I didn’t know what I was doing when I first started out. It’s an expensive mistake to make. Let’s fix that right now. I’m going to walk you through exactly what works, what fails miserably, and how to get that magazine-worthy look without losing your mind or your security deposit. Grab a coffee, because we’re getting into the gritty details.
1. Prioritize Non-Toxic and Low-VOC Options

I can’t stress this enough: skip the cheap, uncertified rolls. I once bought a discount roll off Amazon, and the smell of off-gassing PVC was identical to leaving a cheap plastic pool float in a hot car with the windows rolled up. It gave me a splitting headache for two straight days. Always select papers explicitly labeled as non-toxic, PVC-free, and low-VOC. You want GREENGUARD Gold Certified inks, which guarantee low chemical emissions for your baby’s developing lungs. Brands like Chasing Paper offer fantastic PVC-free options starting at $45 per 2×4 foot panel. Before you even think about sticking it up, wipe down your walls with a mixture of 4 oz of white vinegar and 1 cup of warm water to remove hidden dust. The vinegar smell fades in an hour, leaving a perfectly clean surface. I’ve learned the hard way that skipping this step means your expensive paper won’t stick properly to the wall. Trust me on this.
2. Embrace 2026 Trends With Muted Pastels

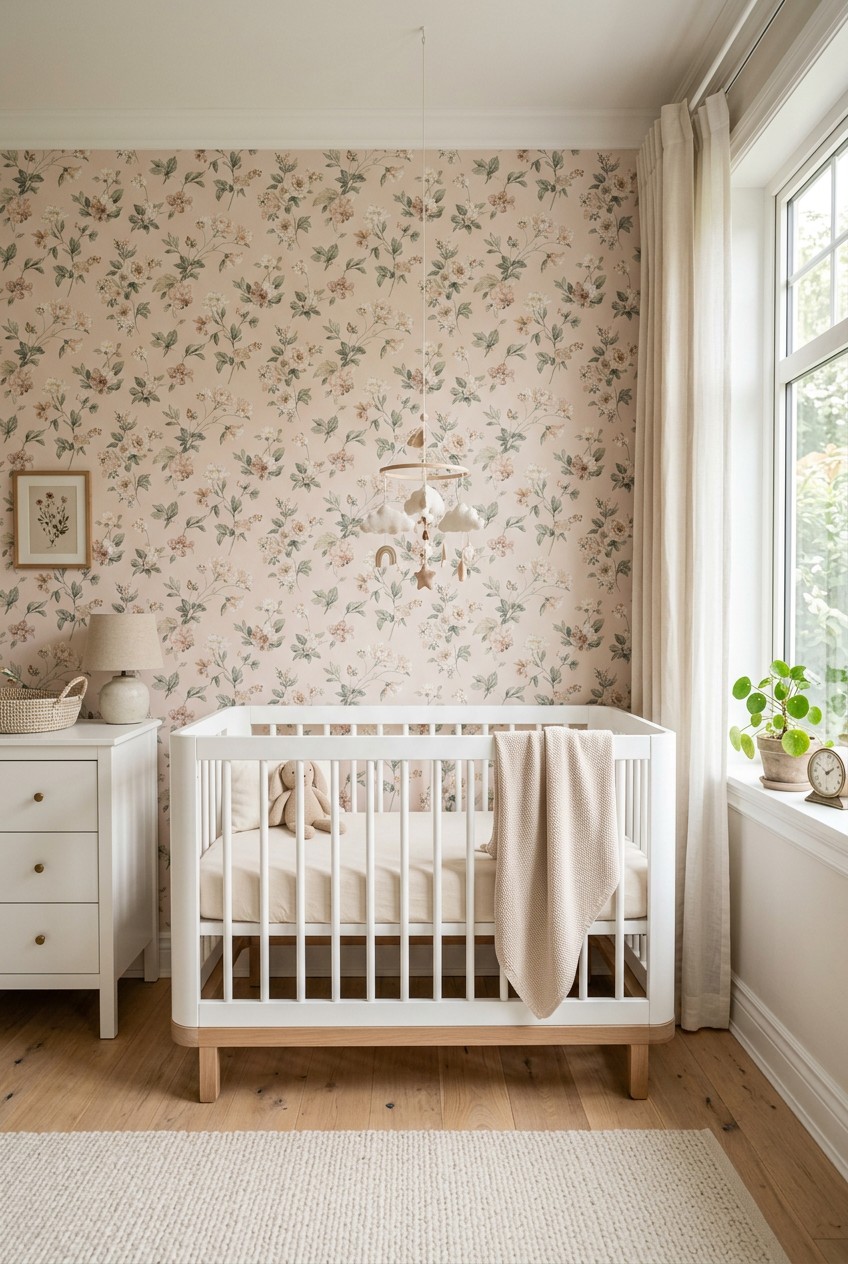
Neon pinks and aggressive magenta tones are out. They look like a melted box of crayons and bounce harsh light around the room when you’re trying to put a baby to sleep at 2 AM. Instead, lean heavily into the 2026 trends of muted pastels and nature-inspired themes. Think dusty pinks, sage greens, and soft botanical prints that feel calming and grounded. I personally swear by the “Lichen Green” design from Rocky Mountain Decals, which costs $39 per 24×48 inch roll. It has this incredible matte finish that absorbs light beautifully. If you want something more romantic, a “Blush Poppy” floral backdrop adds softness without screaming for attention. The visual texture of these muted tones makes the room feel cozy rather than chaotic. I’d highly recommend ordering physical samples first. Tape a 6×6 inch swatch to the wall and look at it during different times of the day to see how the afternoon sun changes the undertones.
3. Try “Wallpaper Drenching” for an Immersive Feel

Instead of doing a single, boring accent wall behind the crib, embrace the trend of “wallpaper drenching.” This means applying the exact same pattern to all four walls, and sometimes even the ceiling, for a truly immersive look. It wraps the room like a giant, comforting blanket. I was standing in the produce section at Sprouts last week, holding a $6.99 pint of organic raspberries, when a client texted me photos of her drenched nursery. It looked incredible. This approach works best with very subtle patterns, like soft cloud motifs or tiny geometrics, so it doesn’t cause overstimulation. Tempaper makes a gorgeous subtle print that costs $42 per 20.5 inch by 16.5 foot roll. If you use a loud, giant floral for drenching, the room will feel like a funhouse mirror. Stick to delicate, repeating patterns. It’s a bold move, but when executed with a soft print, it makes the nursery feel incredibly high-end and intentional.

Beautiful Wooden Baby Closet Dividers Set of 7
Beautiful Wooden Baby Closet Dividers Set of 7 – Double-Sided Organize has been one of the most consistently praised picks in this category. 11 reviewers averaged 4.5/5.
4. Opt for Peel-and-Stick for DIY Ease

If you’re renting, or if you’re the kind of person who gets bored and wants to redecorate every three years, peel-and-stick is your best friend. Last month, I spent four hours scraping traditional glued paper off a wall, inhaling toxic dust, and cursing my past design choices. Peel-and-stick completely eliminates that nightmare. It’s basically a giant sticker. Brands like Spoonflower offer massive collections of peel-and-stick options starting around $39 per 2×3 foot roll. The sound of peeling the heavy paper backing off is incredibly satisfying, like ripping off a massive piece of tape. However, you can’t just slap it up carelessly. You need to smooth it down slowly to avoid trapping air bubbles. If you mess up the alignment, you just gently peel it back and reposition it. It won’t rip your drywall paper off, provided your walls are properly prepped and the paint is fully cured. It’s the most forgiving material for a tired, pregnant mom to work with.
5. Accurately Calculate Rolls to Avoid Shortages

Most people get this wrong and end up crying over a half-finished wall. Do not rely solely on the square footage calculator on a website. You have to measure the exact height and length of each wall. Treat each wall as a solid block (don’t subtract doors or windows entirely, only the raw glass area). For a standard Euro roll, which is 0.53 meters wide and 10 meters long, you need to divide the total wall length by the roll width to get your number of strips. Then, divide by the strips per roll. Always add exactly 5 cm (about 2 inches) extra to the room height for trimming the messy top and bottom edges. I once miscalculated by literally two inches and had to wait three weeks for a replacement roll to ship, leaving a glaring bald spot in the nursery. Always round up and order at least one extra roll from the exact same dye batch. Different batches will have slight, infuriating color variations. You might also like: 15 Beautiful Baby Room Organization Ideas You Haven’t Thought Of
6. Don’t Skip Wall Preparation

A common mistake is treating wall prep like an optional suggestion. It’s not. If your wall has tiny bumps of old paint or small nail holes, they will show through the paper like ugly little pimples. First, fill every single hole with a lightweight vinyl spackling. I buy the 8 oz tub of DAP spackling for $6.99 at my local hardware store. Once it’s dry, sand it down until it feels as smooth as glass under your fingertips. Then, you absolutely must wash the walls. Mix 1/2 cup of white vinegar into 1 gallon of warm water and wipe down every inch with a clean sponge. The water will turn a disgusting gray color, which proves how dirty seemingly clean walls actually are. If you’re using traditional unpasted paper, you must apply a specific wallpaper primer first. I skipped priming in 2019, and three months later, the paper literally peeled off in massive, heavy sheets while my client’s baby was sleeping. Learned that the hard way. You might also like: 20 Creative Small Spaces Baby Room Organization Ideas You Haven’t Thought Of

Modanais Baby Diaper Caddy Organizer Cart
Honestly, Modanais Baby Diaper Caddy Organizer Cart – 3 Tier Rolling Cart with D surprised me — sturdier than it looks in the photos, and over 617 buyers gave it 4.5 stars.
7. Invest in Quality Tools for Flawless Installation

You can’t install wallpaper properly with an old credit card and a dull kitchen knife. I tried that once, and the jagged, ripped edges looked like they were chewed by mice. You need to invest in a proper toolkit. A basic set typically costs between $50 and $150, but you can get a great Rust-Oleum smoothing kit for just $14.99 at Walmart. The kit should include a flexible plastic smoothing tool, a breakaway utility knife with snap-off blades, and a small wooden seam roller. The scraping sound of the plastic squeegee against the dry vinyl might set your teeth on edge, but it’s the only way to push out tiny, stubborn air bubbles. You must snap off the tip of your utility knife blade after every single wall panel. A dull blade won’t cut the wet paper; it will drag and tear it, ruining a $40 panel in two seconds. The seam roller is vital for pressing the edges down flat so they don’t curl up later. You might also like: 20 Clever Daycare Nursery Room Ideas You Can Try Today
8. Match Patterns Meticulously for a Seamless Look

Misaligning a repeating pattern is the fastest way to make an expensive nursery look cheap. Your eye will instantly catch a floral stem that doesn’t quite connect to its leaf. Take your time. I highly recommend buying a 24-inch Stanley bubble level for $12.50. Don’t trust your ceiling or baseboards to be perfectly straight, because in most houses, they aren’t. Draw a faint pencil line down the wall using the level to ensure your very first drop of paper is perfectly plumb. Every subsequent piece follows that first one. If the first piece is crooked by a fraction of an inch, the last piece will be slanted by several inches. Step back across the room after every single panel to check the alignment from a distance. Up close, you might miss a slight shift, but from the doorway, a mismatched pattern screams at you. It takes patience, and your arms will ache from holding the paper up, but the seamless result is entirely worth the physical effort.
9. Consider Fabric Baby Girl Nursery Wallpaper for Texture

If you want a truly luxurious, tactile experience in the nursery, you need to look at fabric wallpapers. They are emerging as a massive trend for 2026. Unlike flat vinyl, fabric adds a rich, woven texture that feels slightly velvety to the touch. It also provides a surprising amount of sound absorption, which is a lifesaver if you live in a noisy neighborhood or have loud dogs. Brands like Spoonflower offer incredible woven fabric options starting at $49 per 2×3 foot roll. I installed this specific baby girl nursery wallpaper in a client’s downtown apartment last year, and it noticeably muffled the street traffic noise. The material is thicker and heavier, which actually makes it slightly easier to install because it doesn’t fold in on itself and stick together like thin vinyl does. Just be aware that fabric holds onto dust slightly more than smooth paper, so you’ll need to run a clean, dry microfiber cloth over it every couple of months.

Criusia Over the Door Organizer
A dependable everyday pick — Criusia Over the Door Organizer pulls in 208 ratings at 4.5 stars. Not flashy, just solid.
10. Choose Washable or Scrubbable Wallpaper

Nurseries are fundamentally messy places. Between projectile spit-up, flying pureed carrots, and eventually, toddler sticky hands, your walls will take a beating. You absolutely must opt for vinyl-based or coated papers that are explicitly labeled as “scrubbable” or “washable.” Standard uncoated paper will absorb liquid instantly, leaving a permanent, greasy stain. I love the washable options from Teepee Joy, which run about $120 per roll. When a mess happens, you just mix 2 tablespoons of Dawn dish soap into 1 quart of warm water. Dip a soft sponge into the suds, wring it out until it’s barely damp, and gently wipe away the milk splatters. The dirt lifts right off without bleeding the ink or damaging the beautiful print. I’ve watched a client try to scrub uncoated paper with a wet wipe, and the pink ink smeared straight across the wall, ruining the entire panel. Don’t make that mistake. Pay the extra money for the scrubbable coating.
11. Select a Subtle Pattern Scale for Smaller Rooms

If your nursery is the size of a standard walk-in closet, putting a massive, oversized tropical leaf print on all four walls will make the room feel like a claustrophobic jungle box. Large, bold prints visually pull the walls inward. For smaller rooms, you need to choose a subtle, small-scale repeating pattern. It adds visual interest without overwhelming the limited square footage. The “Owl Moon” or “Polkadot Dreams” patterns from Milton & King are absolutely perfect for this. They cost around $145 per 32.8 foot roll. The delicate little details draw the eye in, making the walls feel further away than they actually are. I’ve walked into tiny nurseries with giant, dark floral prints, and I instantly felt like the walls were closing in on me. Keep the background color light, and keep the pattern scale small. It’s a simple optical illusion that makes a massive difference in how breathable the room feels.
12. Use Methyl Cellulose Paste for Traditional Paper

If you decide to brave traditional, non-pasted paper, you have to be incredibly picky about your adhesive. Many commercial pastes are packed with harsh fungicides and chemical solvents that you don’t want near a crib. You need to buy a paste made of pure methyl cellulose, which usually comes in a dry powder form. Roman PRO-880 is a fantastic, safe option that costs $19.98 for a 1-gallon bucket. If you buy the powder, you mix it with exactly 16 oz of cold water. It turns into this thick, slightly slimy, clear gel. I remember standing in line at Kroger, buying a 12 oz bag of coffee beans, while waiting for the paste to set up at a client’s house. It takes about 15 minutes to thicken properly. It’s completely non-toxic and doesn’t release harsh fumes. Plus, methyl cellulose paste makes future removal much easier, as it dissolves cleanly with warm water when you’re finally ready to take the paper down.

Hotmoon Sound Machine Baby Night Light
Hotmoon Sound Machine Baby Night Light has been one of the most consistently praised picks in this category. 194 reviewers averaged 4.5/5.
13. Allow Freshly Painted Walls to Cure Completely

This is the most heartbreaking mistake I see DIYers make. If you just painted the nursery walls and you’re eager to get the peel-and-stick paper up, you have to stop and wait. You must allow freshly painted walls to cure for a minimum of 6 weeks. Paint might feel dry to the touch in two hours, but it continues to release invisible gases (off-gassing) for weeks. If you slap a giant vinyl sticker over uncured paint, those trapped gases will cause massive, ugly bubbles to form under the paper. Eventually, the adhesive will fail, and the paper will fall off, taking chunks of your expensive $75-per-gallon Sherwin Williams Emerald paint with it. I rushed a job back in 2021, applying paper after only two weeks, and I had to pay out of pocket to fix the disaster when the paper peeled the drywall flat. Be patient. Give the paint the full 6 weeks to harden.
14. Personalize with Customizable Color Options

Sometimes you find the perfect floral pattern, but the green leaves clash horribly with the specific sage green crib you bought. This is where customizable options save the day. Brands like Love vs. Design offer smooth peel-and-stick rolls for $45 per 2×4 foot panel, but the magic is in their customization tool. They offer over 200 specific color options, allowing you to change the background, the primary pattern, and the accent colors in real-time on their website. I was sitting in the café area at Whole Foods last week, eating a $12 salad, while custom-matching a client’s wallpaper to a very specific dusty rose rug she bought. You can order a $5 custom sample printed with your exact color choices to test in the room’s natural lighting. It ensures that the paper perfectly complements your existing textiles rather than fighting against them. It’s a slightly longer process, but the bespoke result is stunning.
15. Consider Professional Installation for Complex Designs

I know the DIY route is tempting, but there is absolutely zero shame in hiring a professional paperhanger, especially for complex murals, high ceilings, or expensive, unpasted designer papers. A professional installation for a standard 10×12 foot nursery typically ranges from $600 to $1,200. If you have intense surface preparation needs or a complicated matched-seam mural, it can easily push past $2,000. Watching a professional work is mesmerizing. They move with this fluid, confident speed, slicing perfect edges around window frames and electrical outlets without hesitation. If you’re eight months pregnant, dealing with swollen ankles, and feeling overwhelmed by the math of pattern repeats, just hire the pro. It saves you from costly mistakes, wasted materials, and the physical exhaustion of working overhead. I’ve seen too many partners get into screaming matches over crooked wallpaper seams. Sometimes, preserving your sanity and your relationship is worth the $800 labor fee.
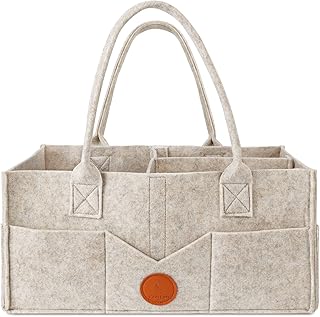
Maliton Baby Diaper Caddy Organizer for Changing Table
Honestly, Maliton Baby Diaper Caddy Organizer for Changing Table surprised me — sturdier than it looks in the photos, and over 32 buyers gave it 4.5 stars.
16. Layering Decals Over Solid Baby Girl Nursery Wallpaper

If you want a truly custom, dimensional look without committing to a busy, repeating pattern, try layering high-quality decals over a solid, textured wallpaper. You apply a beautiful, solid-color grasscloth or a subtle linen-print paper first. Then, you strategically place large, individual floral or animal decals over it. Project Nursery sells these gorgeous, oversized watercolor floral decals for $65 for a set of 20. This technique gives you total control over the placement. You can frame the crib perfectly or have a floral vine seemingly growing up from the baseboards. I did this last year, and the visual depth was incredible. Just make sure you press the edges of the decals down firmly with a dry microfiber cloth so they don’t catch dust. I actually had to run to Costco to buy a massive 30-pack of microfiber towels just to keep the decals pristine during the smoothing process. It’s a brilliant way to get a bespoke mural look using this specific baby girl nursery wallpaper technique.
Designing your baby’s room should be a labor of love, not a source of endless frustration. I’ve made all the sticky, expensive, frustrating mistakes so you don’t have to. If I had to pick just one ultimate favorite approach, I’d strongly suggest going with a high-quality, muted peel-and-stick option from Spoonflower. It gives you the high-end look without the permanent commitment of traditional paste, which is a lifesaver when your little girl eventually decides she wants a completely different room theme in five years. Don’t rush the prep work, measure twice, and always buy that extra roll. If you found these messy truths and specific tips helpful, please pin this article to your nursery mood board on Pinterest so you can reference these exact measurements and brands when you’re ready to start your project!
Frequently Asked Questions
What is the best type of baby girl nursery wallpaper for renters?
Peel-and-stick wallpaper is the absolute best option for renters. It acts like a large sticker, requiring no messy paste, and can be gently removed without damaging the drywall or leaving residue behind.
How long should I wait to apply wallpaper after painting?
You must wait a minimum of 6 weeks for fresh wall paint to fully cure. Applying wallpaper too soon traps outgassing chemicals, which causes the adhesive to fail and creates massive bubbles.
Is traditional wallpaper safe for a baby’s room?
Yes, provided you choose a PVC-free, low-VOC paper and use a non-toxic pure methyl cellulose powder paste. Avoid commercial pastes with harsh chemical solvents or fungicides to keep the air clean.
How do I clean washable nursery wallpaper?
Mix 2 tablespoons of mild dish soap into 1 quart of warm water. Use a barely damp, soft sponge to gently wipe away splatters. Never use abrasive scrubbers or harsh chemical cleaners.
