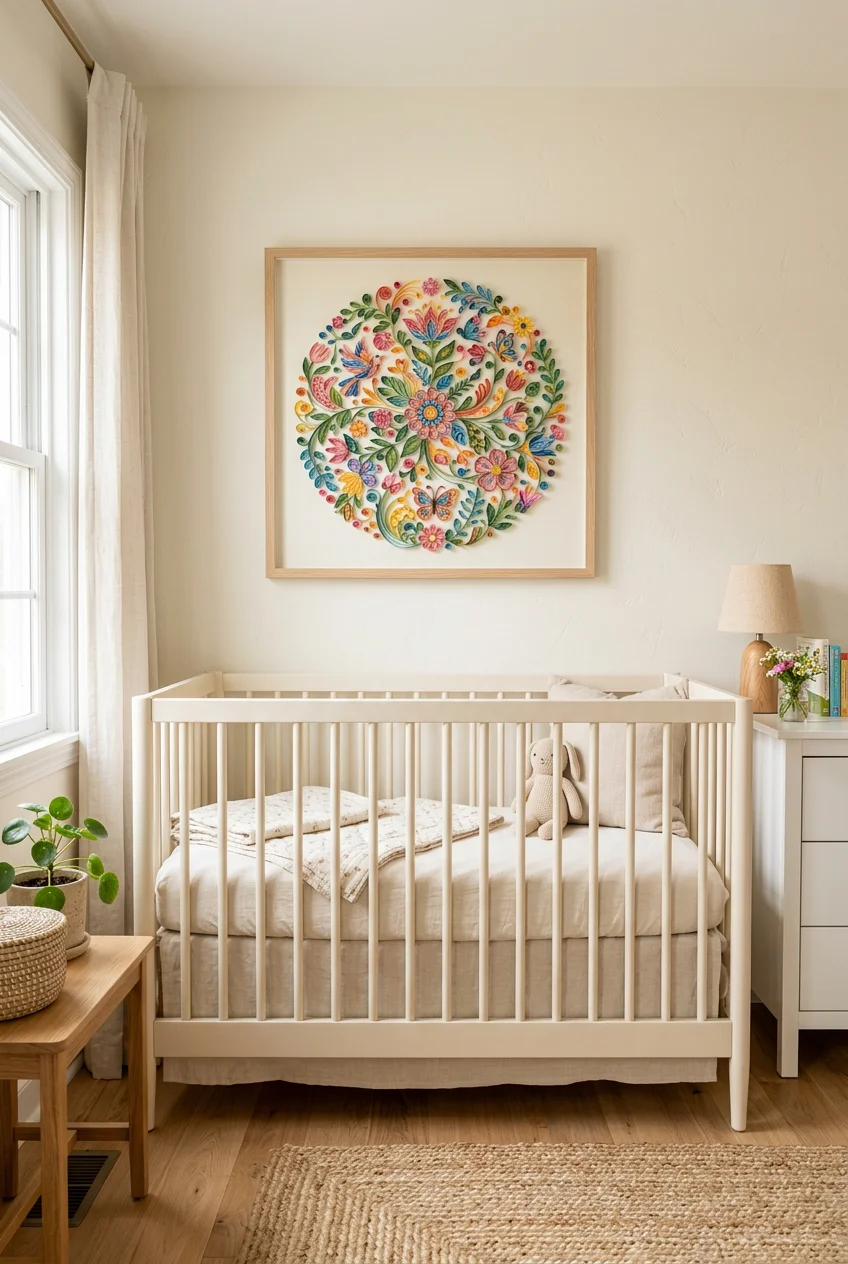
What’s Inside
- Prioritize Acid-Free Paper for Longevity
- Choose 160 GSM Cardstock for 3D Elements
- Invest in Quality Pre-Cut Strips
- Master Basic Shapes with a Slotted Tool
- Use a Precision Fine-Tip Glue Bottle
- Ensure Non-Toxic Adhesives for Baby Safety
- Plan Your Design with a Sketch First
- Utilize a Circle Sizer Ruler for Uniformity
- Create Personalized Framed Initial Art
- Incorporate 3D Elements for Depth
- Avoid Wrinkled Backing with Sturdy Mounts
- Use a Cocktail Stick for Perfectly Centered Coils
- Consider a Quilling Comb for Intricate Patterns
- Hang Art at the Right Height for Nursery Decor
- Experiment with Textured Edges by Ripping Paper
- Create Ombre Monochromatic Animal Shapes
- Build Quilled Hot Air Balloons for Corner Decor
- Seal Your Work with Matte Acrylic Spray
- Mix Watercolor Backgrounds with Quilling
- Try Minimalist Botanical Designs
- How We Chose These Ideas
- Final Thoughts on Nursery Quilling
Most people just hang a generic, mass-produced print over the crib and call it finished. But texture matters. Paper quilling changes the whole vibe of a nursery. You get these intricate, shifting shadows as the afternoon sun hits the wall. It takes patience, sure, but the depth is worlds apart from flat artwork. If you only try one thing from this list, make it #9—the personalized framed initial. It anchors the room with a custom focal point that looks expensive but costs a fraction of boutique art.
Skip this if you want a quick weekend project. Quilling needs fine motor skills and hours of repetitive coiling. If you crave instant results or live in a dusty, high-humidity house where paper warps, stick to traditional prints under glass.
1. Prioritize Acid-Free Paper for Longevity

A huge mistake is using cheap construction paper. Within two years, sunlight turns those crisp whites into a dingy, nicotine yellow. To make sure your nursery decor lasts until the kid heads to college, use acid-free quilling strips. Brands like Quilled Creations and JUYA sell options that hold their color against UV rays. Check the packaging; not all craft store paper hits this mark. Walk into a Michaels or Blick Art Materials and look for the archival label. It’s a non-negotiable baseline. I’ve seen plenty of projects ruined by cheap paper fading unevenly after one summer. I learned that the hard way. The catch: acid-free strips often come in smaller palettes, so you might have to mix brands to find that specific muted sage green.
2. Choose 160 GSM Cardstock for 3D Elements

Flimsy paper makes flimsy art. Standard 75 to 90 GSM paper works for tight coils, but when you build structural elements or 3D designs that pop, it buckles under the tension. Upgrading to 160 GSM cardstock stops the warping and gives the piece a rigid, professional look. Lively Paper Creations sells these heavier strips, and they completely change the integrity of a piece. It prevents that floppy, crushed look that happens when paper absorbs humidity. You can find heavy cardstock at specialty shops. The catch: it takes serious finger strength to manipulate and won’t roll into those micro-tight center coils without cracking. Best for: large-scale statement pieces.
3. Invest in Quality Pre-Cut Strips

Cutting your own strips with a craft knife sounds artisanal, but it’s a fast track to uneven edges and hand cramps. Pre-cut strips ensure consistent width, which is the real secret to a polished piece. When paper height varies by even a millimeter, the art looks jagged and amateur. Brands like Katy Sue Designs and JUYA offer precision-cut strips in 3mm, 5mm, and 10mm. You can find a pack of 600 in 5mm for around $15 at specialty retailers. It eliminates the jagged edges that catch the light poorly in a shadowbox. The catch: you’re paying for convenience, and you’ll burn through a 600-pack way faster than you think.

Beautiful Wooden Baby Closet Dividers Set of 7
Beautiful Wooden Baby Closet Dividers Set of 7 – Double-Sided Organize is sturdier in person than the photos suggest — over 11 buyers gave it 4.5 stars.
4. Master Basic Shapes with a Slotted Tool

Rolling paper with just your fingers or a toothpick is frustrating. A slotted quilling tool has a tiny slit at the tip that grips the paper, letting you spin a coil in seconds. It’s the foundation for teardrops, marquises, and loose coils. You can grab a basic JUYA Paper Quilling Kit with starter tools and 5mm strips for about $7 to $10 online or at stores like Joann. It takes patience, but the muscle memory builds fast. The catch: the slot leaves a tiny crimp in the center of every coil, which perfectionists often find annoying. Best for: absolute beginners learning tension control.
5. Use a Precision Fine-Tip Glue Bottle

Most people ruin their projects in the final minutes by glopping on standard school glue. Paper drinks up moisture, and excess glue causes wrinkling and stains. Use a clear-drying PVA craft glue in a needle-fine tip. Bearly Art Precision Craft Glue costs around $10 to $15 and comes with micro-tips that dispense glue in pinhead dots. Elmer’s Craft Bond works, too, if you transfer it to a precision bottle. You only need a tiny dot to secure a coil. Keep a damp cloth nearby to wipe the nozzle so it doesn’t clog. The catch: those needle-thin metal tips clog constantly, so keep a straight pin handy to clear them.
6. Ensure Non-Toxic Adhesives for Baby Safety

Off-gassing chemicals are a real concern for a nursery. Skip the superglues and heavy-duty adhesives. Stick to non-toxic, water-soluble options. Aleene’s Original Tacky Glue is a staple because it’s non-toxic, dries clear, and has a thick viscosity that grabs paper fast. For an ultra-safe alternative, you can make a paste using 1 cup of flour, 1 cup of cool water, and 1/8 teaspoon of salt. It’s an old-school archival method that holds surprisingly well. It’s incredibly cheap. The catch: homemade flour paste has a short shelf life and needs the fridge, which is a pain for projects taking weeks. Best for: tight budgets. You might also like: 19 Toddler Room Girl for Every Budget

YACHANCE Kids Sound Machine with Night Light Projector
YACHANCE Kids Sound Machine with Night Light Projector is sturdier in person than the photos suggest — over 71 buyers gave it 4.5 stars.
7. Plan Your Design with a Sketch First

Diving into gluing without a map is a great way to end up with a lopsided design. Quilling is basically painting with paper, so you need an outline. Sketch the composition lightly in pencil on your backing board. Map out your focal points and where the negative space should breathe. This stops the common mistake of crowding one corner while leaving another empty. It also helps you calculate how many coils you need before you start. A kneaded eraser helps, but be careful of tearing the backing. The catch: you can’t erase pencil marks after you’ve glued the paper, so keep the sketch faint. You might also like: 15 Gender Neutral Nursery Themes for Every Budget
8. Utilize a Circle Sizer Ruler for Uniformity

Eyeballing your loose coils leads to messy, chaotic patterns. If you’re building a flower with six petals, those coils need to be identical before you pinch them. A quilling circle sizer is a plastic template with recessed circles. You roll a coil, drop it into the 15mm circle, and let it unspool. This guarantees symmetry. You can find these at Walmart in the craft aisle for under $5. Using tweezers to lift the sized coil helps keep the shape. The catch: dropping the coil into the sizer often makes the center pop up or unspool unevenly if the tension is too loose. You might also like: 15 Charming Safari Nursery Lighting Ideas for Every Budget
9. Create Personalized Framed Initial Art

Generic prints lack soul. A personalized quilled initial acts as a stunning, textured focal point. Using 6.5mm paper gives the letters enough depth to cast dramatic shadows in a shadowbox. A standard 8×8 inch deep-set frame is perfect for a single oversized initial with some botanical elements. Custom pieces sell for $30 to $175, but building it yourself lets you match the room’s colors perfectly. You have to manipulate the paper at sharp angles, which takes practice. The catch: typography requires rigid, clean outlines, making it much harder to execute than loose, organic shapes. Best for: gifting to new parents.

Mr. Pen- Baby Diaper Caddy Organizer, Gray, Medium
If you want something that just works, Mr. Pen- Baby Diaper Caddy Organizer is a safe bet (4 reviews, 4.5 stars).
10. Incorporate 3D Elements for Depth

Flat coils look two-dimensional. Pushing paper into 3D shapes creates a sculptural effect that grabs attention. You can form tight coils into domed cups by pushing the center out with a pen, creating berries or flower centers. Using 160 GSM paper keeps these from collapsing. This pulls the art off the board and interacts beautifully with room lighting. They need deep frames to protect them from dust and little hands. The catch: 3D elements are fragile. If the frame gets bumped, those hollow domes will crush and are impossible to pop back out.
11. Avoid Wrinkled Backing with Sturdy Mounts

Gluing hundreds of coils onto printer paper is a disaster. The moisture from the glue and the weight of the paper will cause the background to buckle and curl. Always mount your decor onto thick, rigid mat board or illustration board. If you want a pattern, use spray adhesive to mount scrapbook paper onto the mat board first. Take your time cutting; a jagged edge ruins the look. The catch: standard scissors won’t cut thick mat board. You’ll need a utility knife, a metal straight edge, and a cutting mat for those square corners.
12. Use a Cocktail Stick for Perfectly Centered Coils

When you use a slotted tool, the center of your coil often ends up crimped and off-center. There is a way to fix this. After forming the coil and gluing the tail, take the sharp point of a cocktail stick. Gently push the center of the spiral from the inside, shifting that crimped section to one side. This redistributes the paper, resulting in a smooth, round hole. It upgrades the look from a craft to professional art. It’s a tiny detail, but it improves the symmetry. The catch: too much pressure will tear the delicate paper, ruining the whole coil.

Modanais Baby Diaper Caddy Organizer Cart
If you want something that just works, Modanais Baby Diaper Caddy Organizer Cart – 3 Tier Rolling Storage Car is a safe bet (347 reviews, 4.5 stars).
13. Consider a Quilling Comb for Intricate Patterns

For uniform, cascading loops—like feathers or ferns—a slotted tool won’t work. A quilling comb has long, spaced metal prongs. By weaving a strip back and forth around these prongs, you create precise, graduated loops that can be pinched at the base. It’s a technical look that adds immediate sophistication to botanical designs. You can find these for under $10. Once mastered, it creates architectural details that rolling can’t touch. The catch: learning the tension required to weave paper around a metal comb without snapping it involves a steep, frustrating learning curve. Best for: intermediate crafters.
14. Hang Art at the Right Height for Nursery Decor

Most people hang art too high, making the room feel disjointed. When framing pieces for above a crib, scale is everything. A standard crib is about 54 inches wide, so the art should span roughly 27 to 36 inches to look anchored. A trio of 12×15 inch matted shadowboxes works well. Hang them so the bottom edge is 8 to 10 inches above the crib rail. You’ll need bulk packs of strips so you don’t run out mid-project. The catch: filling three 12×15 frames will easily take over a hundred hours of labor, making this a huge time commitment.
15. Experiment with Textured Edges by Ripping Paper

Quilling is usually about clean lines. Introducing a rough texture creates a striking contrast. Instead of cutting every strip, try ripping the ends of wider strips. When you roll these, the raw, fibrous edge shows. This is brilliant for fluffy clouds, sheep’s wool, or moss at the base of a tree. It breaks up the rigid geometry of standard coils. A quick blast of compressed air keeps your desk clean. The catch: ripping paper creates microscopic dust that sticks to glue dots and muddies your background if you aren’t careful about wiping down your workspace.
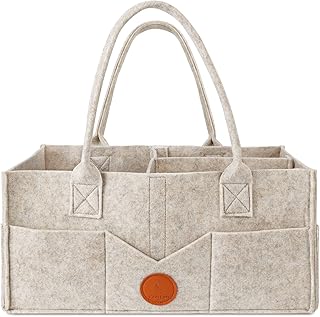
Maliton Baby Diaper Caddy Organizer for Changing Table
If you want something that just works, Maliton Baby Diaper Caddy Organizer for Changing Table is a safe bet (33 reviews, 4.5 stars).
16. Create Ombre Monochromatic Animal Shapes

Bright primary colors can look chaotic. A sophisticated alternative is creating animal silhouettes using a monochromatic ombre palette. Buy a multi-pack of strips in shades of one color, like dusty rose or slate gray. Start with the darkest shade at the bottom and transition to the lightest at the top. It creates a modern, soothing gradient that fits neutral or minimalist rooms. The visual impact is worth the extra cost. The catch: buying individual packs of specific shades from brands like Quilled Creations is much more expensive than a standard rainbow variety pack. Best for: modern, neutral-toned homes.
17. Build Quilled Hot Air Balloons for Corner Decor

Hot air balloons are a classic nursery motif that translates beautifully to quilling. Build the envelope using tight coils in pastel shades, and construct the basket out of woven brown strips. Mounting these in the corners of a large shadowbox creates a sense of movement. Add some ripped-edge clouds behind them to finish the scene. You can find pastel packs at Target for under $15. You’ll definitely need a magnifying lamp for this level of micro-quilling. The catch: weaving the tiny basket requires manipulating delicate 3mm strips with tweezers, which is incredibly tedious and strains the eyes.
18. Seal Your Work with Matte Acrylic Spray

Even with acid-free paper, humidity and dust are enemies. Raw paper left in a damp room will eventually unspool. To lock the design, take your finished, dried piece outside and give it a light coat of a UV-resistant matte spray, like Krylon UV-Resistant Clear, which costs about $10 to $18. This creates a barrier against humidity and prevents fading. Test the spray on a scrap piece first. The catch: spraying too close or too heavily will saturate the paper, causing colors to bleed and coils to warp beyond repair.
19. Mix Watercolor Backgrounds with Quilling

A stark white background can feel clinical. Blending quilling with a soft watercolor wash creates a stunning mixed-media effect. Before gluing, paint a loose, abstract wash on heavy 300 GSM cold-pressed watercolor paper. A blush pink or sky blue provides a muted canvas that makes the raised edges of the quilled paper pop. You can find high-quality watercolor blocks at Michaels. Using a heavier glue or gel medium helps with adhesion. The catch: watercolor paper has a textured “tooth” that makes it hard for tiny glue dots to stick, so you have to hold each piece down until it tacks up.
20. Try Minimalist Botanical Designs

Nursery decor doesn’t have to be cartoon animals. A minimalist botanical design—like a curved olive branch or a single monstera leaf—brings a calm, sophisticated energy. Using shades of green 5mm strips, you can create veins and stems that look architectural. This style transitions perfectly as the child grows, never feeling too juvenile. Frame it in a sleek oak shadowbox for a modern finish. You must be precise with glue to pull off this look. The catch: minimalist designs rely on negative space. With no dense clusters of coils to hide behind, every uneven loop or glue smudge will be glaringly obvious.
How We Chose These Ideas

I’m often asked how to pick decor methods for delicate spaces. Selecting the right techniques for paper quilling comes down to balancing visual impact with durability. These ideas were filtered based on renter-friendliness, material cost, physical effort, and how well the finished pieces hold up against household humidity. The focus is strictly on methods that produce clean, professional shadows and structural integrity.
Final Thoughts on Nursery Quilling
Building a textured, dimensional space doesn’t need a huge budget, just strategic material choices. I’d recommend starting with a small project like a single botanical leaf before committing to a massive three-piece wall installation. Pin this list to your nursery planning board so you have these paper weights and glue techniques handy when you’re ready to start rolling.
Frequently Asked Questions
What is the best paper width for nursery quilling?
For most nursery decor, 5mm paper strips offer the best balance of structural depth and ease of rolling. Thinner 3mm strips work for delicate details, while 10mm strips are ideal for bold, 3D statement pieces.
Can I use regular Elmer’s glue for paper quilling?
Standard school glue contains too much water and will warp your paper. Always opt for a clear-drying PVA craft glue applied with a precision fine-tip needle applicator to prevent staining and wrinkling.
How do you protect quilled wall art from dust?
The most effective method is framing your quilled art inside a deep shadowbox frame behind glass or acrylic. If leaving it exposed, a light coat of UV-resistant matte acrylic spray provides a minimal protective barrier.
Is paper quilling safe for a baby’s room?
Yes, provided you use non-toxic, water-soluble adhesives and acid-free paper. Keep all unsealed, 3D quilled elements out of reach, as the delicate paper shapes are easily crushed by curious toddlers.
