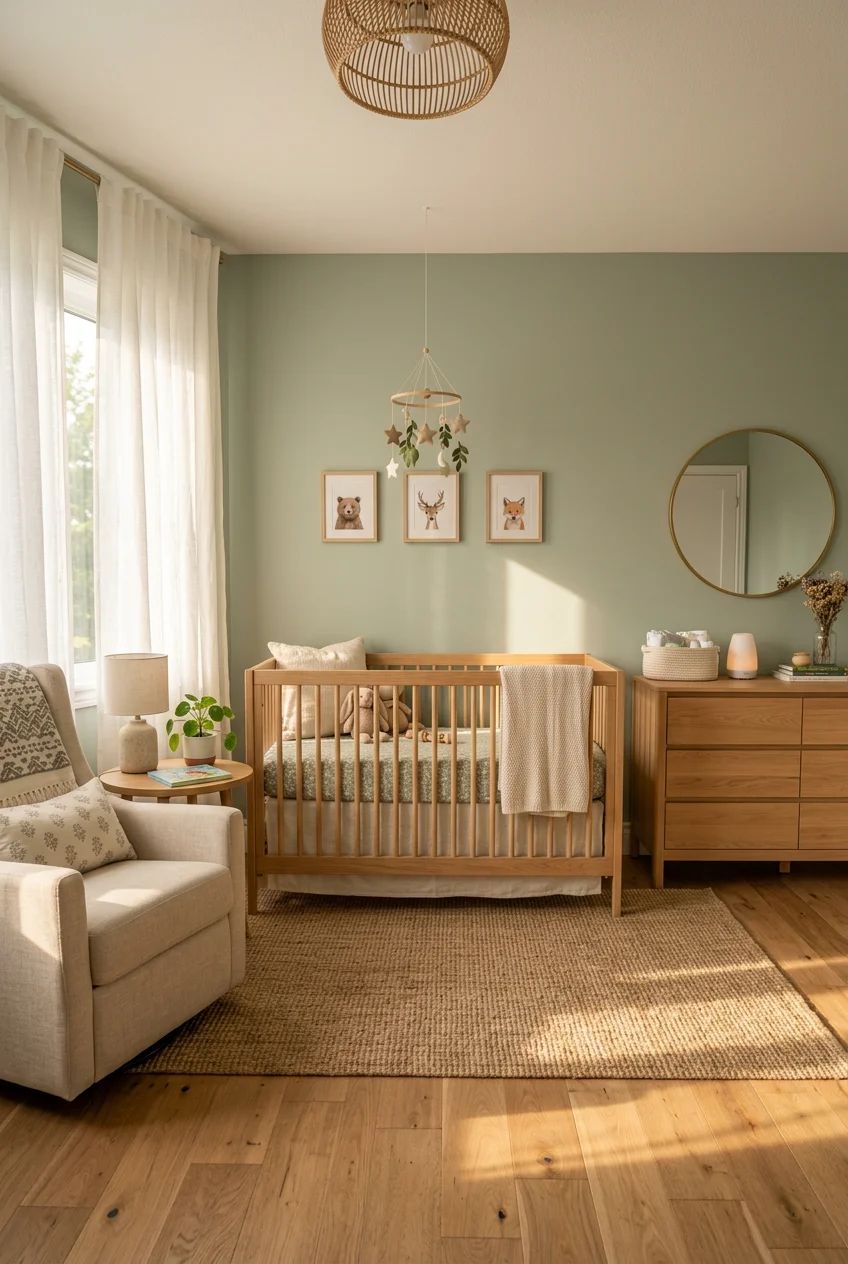
What’s Inside
- Prioritize Safety With Strategic Crib Placement
- Invest In A Convertible Crib For Long-Term Value
- Choose A Multifunctional Changing Station
- Create A Comfortable And Accessible Feeding Nook
- Embrace Layered Warm Lighting For Sleep
- Maximize Vertical Storage With Wall-Mounted Shelving
- Implement Smart Visible Storage Solutions
- Anchor All Tall Furniture For Safety
- Plan For Growth With A Gender-Neutral Palette
- Define Functional Zones Within Your Nursery Furniture Layout
- Consider A Center Crib Layout For Spacious Rooms
- Incorporate Biophilic Design Elements Naturally
- Avoid Overcrowding The Room With Unnecessary Pieces
- Integrate Calm Tech Without The Visual Clutter
- Utilize Drawer Dividers And Labels For Organization
- Add A Mobile Diaper Station For Flexibility
- Place A Small Side Table Within Arm’s Reach
I spent my first three nights as a mother tripping over a $400 rocking chair because my initial nursery furniture layout was completely backward. A functional nursery furniture layout requires more than just picking cute pieces from a catalog. I placed the crib right next to the door and shoved the glider into a dark corner, which meant I was stubbing my toe on wooden legs at 3 AM while carrying a crying infant. I learned the hard way that a poorly planned room makes sleep deprivation significantly worse. Let’s break down the exact spacing, specific furniture choices, and layout strategies that actually work when you’re functioning on two hours of sleep. I’ve designed dozens of rooms as a consultant, and I see the exact same spatial mistakes over and over. Here is exactly how to set up a room that functions as well as it looks.
1. Prioritize Safety With Strategic Crib Placement

I tried placing my daughter’s crib under a beautiful double-hung window in our old apartment. It looked great for photos, but I quickly realized the draft from the glass made the space ten degrees colder than the rest of the room. You’re going to want to position the crib on a solid interior wall, completely away from windows, blinds with cords, and direct ventilation systems like heating vents or AC units. I recommend maintaining a minimum of 24 to 30 inches of clearance around the entire crib. This gives you enough physical space to walk around it safely in the dark without bumping your hips. If you buy a standard crib like the Delta Children Emery for $199.99 at Target, you need to account for its 55-inch width against your wall space. Putting the crib near the door also exposes the baby to hallway noise. Keep it tucked away in a quiet corner, but ensure you have a clear, unobstructed path from the door to the mattress for those middle-of-the-night panic runs when they start coughing.
2. Invest In A Convertible Crib For Long-Term Value

I bought a cheap, non-convertible crib at Walmart for $99 with my first baby. By the time he was two, I had to throw it out and buy a toddler bed, wasting money and time. Now, I always tell clients to opt for a 3-in-1 or 4-in-1 convertible crib. The Babyletto Hudson for $399.00 or the Babyletto Modo for $349.00 are solid choices because they transition from a standard crib to a toddler bed and eventually a daybed. If you have a larger budget, the Stokke Sleepi V3 Crib costs $949.00 but actually grows with your child from birth up to age five. It’s made from FSC-certified beech wood, which feels incredibly sturdy and doesn’t off-gas that terrible chemical smell you get with cheap particleboard. When you map out your room, remember that a convertible crib will stay in that exact spot for up to five years. You aren’t just planning for a newborn. You’re planning for a toddler who will eventually need floor space to climb out of bed and play with blocks.
3. Choose A Multifunctional Changing Station

Skip the dedicated changing tables completely. I bought a flimsy wooden changing table for $150 at IKEA, and it became a useless laundry catch-all by month eight. Instead, utilize a heavy, sturdy dresser with a removable changing pad on top. The Babyletto Palma 7-drawer dresser retails for $799.00 and provides enough surface area for a standard 32-inch changing pad plus a basket for wipes and creams. This completely avoids the matchy furniture sets mistake that made old nurseries look like cheap showrooms. A real dresser gives you deep storage for bulky items like sleep sacks and extra crib sheets. I use a Keekaroo Peanut Changer for $149.95 on top of a vintage oak dresser. The rubbery texture of the Keekaroo wipes clean instantly when there is a diaper blowout, which happens more often than you think (learned that the hard way). Once your baby is potty trained, you just remove the pad, and you’re left with a beautiful piece of furniture that holds their clothes for the next decade.
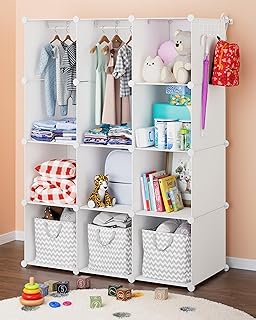
CUBEDIY Baby Closet Organizer for Nursery: Durable Baby
If you want something that just works, CUBEDIY Baby Closet Organizer for Nursery: Durable Baby Wardrobe for C is a safe bet (316 reviews, 4.5 stars).
4. Create A Comfortable And Accessible Feeding Nook

I spent three months nursing in a rigid wooden rocking chair before my back completely gave out. You need a comfortable glider or a fully skirted upholstered chair, exactly like designer Andi Morse recommends for modern spaces. I bought the Pottery Barn Kids Comfort Swivel Glider for $899.00, and the thick foam cushioning saved my spine during 45-minute cluster feeding sessions. Place the chair next to the crib or directly across from it. You want the transition from feeding to sleeping to take exactly three steps. Ensure you have a small side table that is at least 18 to 20 inches tall right next to the armrest. I use a simple metal pedestal table from Crate & Kids for $129.00. It holds a 16-ounce water bottle, a stack of thick burp cloths, and a small dimmable lamp. If the table is too low, you’re going to strain your abdominal muscles leaning down to grab your water while balancing a sleeping infant on your chest.
5. Embrace Layered Warm Lighting For Sleep

Overhead flush-mount lights are terrible for nurseries. Flipping a standard light switch at 2 AM feels like staring into the sun, and it instantly wakes the baby up completely. I learned to integrate soft, warm 2700K LED bulbs in multiple fixtures across the room. This calm lighting movement is a major 2026 trend, but it’s really just common sense for tired parents. I installed a dimmable wall sconce from West Elm for $149.00 right above my feeding chair. It gives off a soft, amber glow that is just bright enough to see if the baby is latching correctly, but dim enough that we both stay sleepy. I also keep a Hatch Rest Sound Machine for $69.99 on the dresser. You can control the light color from your phone. I set it to a deep red hue at 5 percent brightness for nighttime diaper changes. Red light doesn’t interfere with melatonin production. You’re going to want at least three light sources. An overhead dimmer, a reading lamp, and a nightlight.
6. Maximize Vertical Storage With Wall-Mounted Shelving

Floor space disappears quickly once you add a crib, a dresser, and a glider. I tried putting a standalone bookcase in my son’s room, but it just made the space feel cramped and gave him something dangerous to climb on later. Utilize wall-mounted shelves above the changing station or in a corner reading nook. I bought three acrylic floating shelves from The Container Store for $24.99 each. I mounted them exactly 48 inches off the floor, spacing them 12 inches apart vertically. This frees up your floor plan while providing accessible storage for board books, small wooden toys, and essential items like a $12 tube of Aquaphor. When you place shelves near the changing pad, make sure they are high enough that a kicking six-month-old can’t knock things down. I keep the top shelf strictly for items I need quick access to, like infant Tylenol and a nasal aspirator. The visual weight of floating shelves is much lighter than a bulky wooden bookcase.

Criusia Drawer Organizer Clothes
Criusia Drawer Organizer Clothes punches above its price — 11 buyers rated it 4.5 stars. I would buy it again.
7. Implement Smart Visible Storage Solutions

Newborns require an absurd amount of tiny accessories. I used to dig blindly through deep dresser drawers looking for a specific pair of scratch mittens while my baby screamed. You’re going to save your sanity by using clear Lucite bins, open-ended baskets, or windowed drawers for easy visibility. Happiest Baby experts suggest this method because it drastically reduces the time spent searching. I bought a set of four clear plastic bins from Costco for $19.99 and lined them up on the top shelf of the closet. One holds size one diapers, one holds wipes, one holds swaddles, and one holds burp cloths. I can see exactly when inventory is running low before I run out completely. I also use a heavy canvas bin from Target for $15.00 for dirty laundry. It sits right next to the changing table. Visible storage means you don’t have to open three different drawers with one hand while holding a squirming baby with the other.
8. Anchor All Tall Furniture For Safety

I can’t stress this enough. I skipped anchoring a lightweight IKEA Hemnes dresser for $199.00 because I thought my six-month-old wasn’t mobile yet. A month later, he pulled himself up on the bottom drawer, and the whole thing wobbled dangerously. Secure dressers, bookshelves, and any other tall furniture directly to the wall studs using heavy-duty anti-tipping devices. Most new furniture comes with thin plastic zip-ties, but I throw those away and buy the Hangman Anti-Tip Metal Kits from Home Depot for $6.98. They use a steel cable that won’t snap under pressure. This is a critical safety measure you must complete before the baby even arrives. Once they start pulling themselves up and cruising along furniture edges, you won’t have time to empty the dresser, find your drill, and locate a wall stud. Make this a non-negotiable part of your initial setup process. It takes twenty minutes and provides absolute peace of mind when your toddler starts treating their room like a jungle gym. You might also like: 16 Toddler Room Ideas You Need to See
9. Plan For Growth With A Gender-Neutral Palette

I painted my first nursery a bright, aggressive pink. By the time my daughter was three, she hated it and demanded blue walls, forcing me to spend a weekend repainting. Opt for neutral color palettes like warm mushroom, smoky sage, or muted greige. These tones are heavily trending for 2026 under the mood-first nursery concept, but they’re also highly practical. I used Farrow & Ball’s Pigeon for $140.00 per gallon, which is a soft blue-grey that looks completely different depending on the light. Choose furniture in timeless finishes like natural white oak or matte white. A white oak dresser from Crate & Barrel for $899.00 works just as well for a newborn as it does for a teenager. This approach creates a serene backdrop that evolves with your child. You can add color through easily changeable items like a $45 patterned crib sheet or a $120 washable rug from Ruggable. Avoid permanent themes like painted murals or heavy wallpaper that lock you into one specific aesthetic. You might also like: 16 Baby Boy Room Ideas Worth Trying

Criusia Over the Door Organizer
A dependable everyday pick — Criusia Over the Door Organizer pulls in 231 ratings at 4.5 stars. Not flashy, just solid.
10. Define Functional Zones Within Your Nursery Furniture Layout

A chaotic room leads to a chaotic routine. You have to create distinct areas for sleeping, changing, feeding, and playing. I map out a nursery furniture layout by dividing the floor plan into four quadrants. The sleep zone is the quietest corner, holding just the crib and a sound machine. The changing zone is near the closet, holding the dresser and laundry hamper. The feeding zone gets the glider and side table. Finally, I leave a large 5-by-5 foot open space on the floor for the play zone. I put a thick 0.5-inch foam playmat from House of Noa for $159.00 in this area. Keep the play zone away from the crib to prevent overstimulation when it’s time to sleep. If a baby associates their crib with playtime, you’re going to fight them at every nap. A structured room naturally guides your daily routine. You feed in the chair, change on the dresser, and place them in the crib, moving smoothly from one zone to the next. You might also like: 18 Nursery Themes Boy Worth Trying
11. Consider A Center Crib Layout For Spacious Rooms

Most people automatically shove every piece of furniture against the walls, creating a dead, empty space in the middle of the room. If you have a larger nursery, placing the crib directly in the center is a surprising tip that completely changes the flow of the space. I tried this in a 12-by-14 foot room, and it made the crib a stunning focal point. We used the oval-shaped Stokke Sleepi for $949.00, which looks incredible floating in the middle of the floor. This layout allows you to create much more defined activity zones around the perimeter. You can have a massive reading nook in one corner and a full wall of wardrobes in another. You need at least 36 inches of walking space on all sides of a center crib for it to work properly. It also makes changing sheets significantly easier because you can walk all the way around the mattress instead of leaning awkwardly over the front rail while pulling a tight fitted sheet.
12. Incorporate Biophilic Design Elements Naturally

Babies respond well to natural textures. I used to buy cheap plastic decor, but it always made the room feel sterile and cheap. Bring nature indoors by selecting furniture made from natural materials. Look for FSC-certified wood, rattan, and bamboo. I bought a beautiful rattan storage basket from Serena & Lily for $128.00 to hold extra blankets. The woven texture adds incredible warmth to a plain white corner. Pair these raw materials with earthy tones and subtle botanical prints. I hung a set of three framed fern prints I found on Etsy for $45.00 above the changing table. This biophilic design approach creates a soothing, development-friendly environment that doesn’t overstimulate a developing brain. I also placed a real, non-toxic parlor palm plant in a heavy ceramic pot for $35.00 from a local nursery on a high shelf where little hands can’t reach the soil. The green leaves break up the rigid lines of the furniture and actually help purify the stale indoor air.

Beautiful Wooden Baby Closet Dividers Set of 7
A dependable everyday pick — Beautiful Wooden Baby Closet Dividers Set of 7 – Double-Sided Organize pulls in 11 ratings at 4.5 stars. Not flashy, just solid.
13. Avoid Overcrowding The Room With Unnecessary Pieces

It’s incredibly easy to buy too much stuff when you’re nesting. I packed my first nursery with a crib, a dresser, a glider, a bookshelf, a toy chest, and a side table. The room was a 10-by-10 square, and I literally had to squeeze past the glider to reach the closet door. Overcrowding makes the room feel cramped and creates tripping hazards. Resist the urge to fill every empty wall. Stick to the absolute essentials initially. A place to sleep, a place to change diapers, and a place to sit. Ensure you have at least 24 to 30 inches of clear walking space between every piece of furniture. If you can’t fit a dedicated bookshelf, just use a $20 woven basket on the floor for board books. I ended up moving the bulky toy chest into the living room and felt immediate relief. You can always add more furniture later if you genuinely need it, but you can’t manufacture more floor space once the room is full.
14. Integrate Calm Tech Without The Visual Clutter

Nursery monitors used to look like giant plastic robots staring at your baby. I hated the mess of black cords hanging down the wall. Now, I focus on integrating calm tech that blends completely into the decor. I use the Nanit Pro Camera for $299.00 with the floor stand. It has a sleek, minimalist white design that tucks behind the crib, and it features low EMF emissions. I run the cord through a white plastic cord concealer for $14.99 at Home Depot painted the exact same color as the wall. I also use a Dyson Purifier Cool Gen1 for $429.99 in the corner. It acts as a smart climate control system, an air purifier, and a fan, completely eliminating the need for three separate ugly appliances. The goal is to have the technology work silently in the background without creating visual clutter. You don’t want the room to feel like a server closet. Hide the cords, choose white or matte silver appliances, and keep the glowing screens to a minimum.
15. Utilize Drawer Dividers And Labels For Organization

Baby clothes are tiny, and they turn into a wrinkled, tangled mess inside a standard dresser drawer. I spent weeks frustrated because I couldn’t find socks that matched. You need to use adjustable bamboo drawer dividers to categorize clothes by age and type. I bought a 4-pack of Royal Craft Wood bamboo dividers from Amazon for $22.99. I split the top drawer into three neat sections. Newborn onesies on the left, 0-3 month onesies in the middle, and pants on the right. This maximizes space and efficiency when you’re dressing a wiggly baby. I also highly recommend using bin clip labels from The Container Store for $9.99 on your closet storage bins. I label one bin “Too Big” and one bin “Too Small.” Infants grow rapidly, and you will constantly be cycling clothes in and out. When a onesie gets too tight, I immediately toss it into the “Too Small” bin so it doesn’t clutter up the active dresser drawers.

Delta Children Nursery Storage 48 Piece Set
If you want something that just works, Delta Children Nursery Storage 48 Piece Set – Easy Storage/Organizatio is a safe bet (17 reviews, 4.5 stars).
16. Add A Mobile Diaper Station For Flexibility

Sometimes you don’t want to carry a screaming baby all the way to the nursery for a quick diaper change. I learned this when my son had a blowout in the living room, and I had to carry him like a ticking time bomb up a flight of stairs. Consider a mobile diaper station on a rolling cart. I bought the 3-Tier Metal Utility Cart from Target for $40.00. I loaded the top tier with Pampers Swaddlers for $45.99 a box, a wipe dispenser, and a tube of Boudreaux’s Butt Paste for $9.49. The middle tier holds clean burp cloths, and the bottom tier holds a portable changing mat. You can roll this cart into the bathroom during bathtime, keep it in the living room during the day, and park it next to the nursery dresser at night. It gives your layout incredible flexibility. The wheels lock, so it stays firmly in place when you’re actively using it, and the metal frame wipes clean with a damp baby-safe cloth I pick up from Whole Foods.
17. Place A Small Side Table Within Arm’s Reach

I mentioned the side table earlier, but it deserves its own focus because getting the placement wrong is miserable. I initially used an old wooden stool that was only 12 inches high. Every time I needed my phone or a tissue while nursing, I had to contort my body sideways, which disrupted the baby’s latch. Your side table must be level with the armrest of your glider, typically around 18 to 22 inches tall. I eventually bought the West Elm Martini Side Table for $159.00. It has a heavy, weighted base so the cat can’t knock it over, and the 15-inch diameter top is just large enough for the essentials. You need exactly enough room for a dimmable touch lamp so you aren’t fumbling for a switch, a large water tumbler, and your phone. Do not put a table with sharp square corners next to the chair. When you stand up in the dark with a baby in your arms, a sharp wooden corner to the thigh is brutally painful (took me years to figure out).
Getting your room setup right the first time saves you from making exhausted adjustments at three in the morning. I’ve rearranged enough heavy dressers to know that practical spacing always beats a Pinterest-perfect but cramped layout. Take the time to measure your walking paths, anchor your tall pieces, and test the distance from your glider to the crib. If you found these spacing and organization tips helpful, pin this article to your baby prep board so you have the exact measurements handy when you start unboxing furniture.
Frequently Asked Questions
Where is the safest place to put a crib in a nursery furniture layout?
Place the crib on a solid interior wall away from windows, blind cords, and direct HVAC vents. You need 24 to 30 inches of clearance around the crib to ensure safe access in the dark.
Do I really need a dedicated changing table?
No. A sturdy 7-drawer dresser with a removable changing pad on top is significantly more practical. It provides better storage for bulky items and functions as a standard piece of furniture once your child outgrows diapers.
How much space do I need between nursery furniture?
Maintain a minimum of 24 to 30 inches of clear walking space between all major pieces of furniture. This prevents the room from feeling overcrowded and eliminates tripping hazards when you are carrying your baby.
What is a center crib layout?
In spacious rooms, a center crib layout places the crib in the middle of the floor rather than against a wall. This requires at least 36 inches of clearance on all sides and creates distinct activity zones around the room’s perimeter.
