
What’s Inside
- Install Wall-Mounted Shelving with at Least Three Tiers
- Use File Folding to Increase Drawer Capacity by 30-50%
- Implement a Three-Bin Closet System with Clear Labels
- Add a Removable Changing Table Topper to Your Dresser
- Use a Portable Folding Crib Like the Metro Play Yard
- Organize Dresser Drawers by Function and Frequency
- Install Closet Dividers with Age-Based Partitions
- Create a DIY Pegboard for Supplies Near the Changing Station
- Use Stackable Bins for Small Accessories
- Install Over-the-Door Organizers for Bibs and Changing Pads
- Add Extra Hanging Rods and Shoe Risers to Your Closet
- Implement a Toy Rotation System with Clear Labeling
- Invest in Multi-Functional Furniture with Built-In Storage
- Maximize Under-Crib Storage with Low-Profile Bins
- Incorporate Biophilic Design with Functional Storage
- Create a Command Center with a Small Wall Calendar and Hooks
- Use Tension Rods to Create Vertical Dividers in Deep Drawers
- Designate a Specific Spot for Outgrown Items
- Install a Narrow Rolling Cart for Nighttime Essentials
- Label Everything with a Label Maker
I spent three weeks tripping over diaper boxes in our 9×10 nursery before I finally admitted defeat. Finding ideas small spaces baby room organization that don’t require knocking down walls or winning the lottery? That’s the real challenge. After reorganizing our tiny nursery four times (yes, four), I’ve learned which strategies actually work and which ones just look pretty on Instagram.
Here’s what nobody tells you: most nursery organization advice assumes you have a spare room the size of a master bedroom. I’m talking real solutions for actual small spaces where every square inch counts.
Install Wall-Mounted Shelving with at Least Three Tiers

I personally swear by vertical storage because floor space is basically gold in a small nursery. The SOHO Bookshelf (around $120 at Target) has four shelves plus a top surface, and it completely transformed our blank wall into functional storage. I keep board books on the bottom two shelves where my toddler can reach them, storage boxes with backup supplies on the third shelf, and nursery décor on top.
Here’s the pro tip most people miss: install wall hooks directly above your shelving unit. I added three brass hooks about 12 inches above our bookshelf and now I hang sleep sacks, jackets, and blankets there. It creates this layered storage system that uses the same wall footprint but doubles your capacity.
The common mistake? Buying shelves that are too shallow. You want at least 10 inches of depth to fit standard storage bins. Those trendy 6-inch floating shelves look cute but hold basically nothing useful.
Use File Folding to Increase Drawer Capacity by 30-50%

Honestly, this changed how I organize every single drawer in our house, not just the nursery. File folding (the KonMari method) means folding clothes so they stand upright like files in a cabinet instead of stacking them flat. I was skeptical until I reorganized our dresser and suddenly fit 15 onesies in a drawer that previously held 8.
The difference is dramatic. With traditional stacking, you can’t see what’s at the bottom without destroying your organization. With file folding, I can see every single item at a glance during 3am diaper changes when my brain barely functions. I use this for onesies, sleepers, blankets, bibs, and even cloth diapers.
It takes about 30 minutes to refold everything initially, but I promise it’s worth it. YouTube has tons of tutorials, and once you get the hang of it, folding actually goes faster than the old way. The key is making each folded item about the same width so they stand up properly.
Implement a Three-Bin Closet System with Clear Labels

I learned this the hard way after finding a bag of 3-month clothes when my daughter was already 9 months old. Now I use three stackable bins labeled “Now,” “Next Size,” and “Too Small.” This system keeps me from drowning in baby clothes while maintaining some semblance of organization as sizes change every six weeks.
The “Now” bin stays easily accessible on a lower closet shelf. “Next Size” goes up higher since I’m not digging through it daily. “Too Small” gets sorted monthly—I either pass clothes to friends, donate them, or pack them away if we’re planning another baby. Without this system, clothes from four different sizes end up mixed together and you waste time hunting for something that actually fits.
I use clear plastic bins from The Container Store (about $15 each) because I can see contents without opening them. Label them with a label maker or even just masking tape and a Sharpie. The goal is that anyone helping with laundry can maintain the system.

JolyWell Night Light for Kids
JolyWell Night Light for Kids punches above its price — 63 buyers rated it 4.5 stars. I would buy it again.
Add a Removable Changing Table Topper to Your Dresser

This is probably the smartest space-saving decision I made. Instead of buying a separate changing table that becomes useless after 18 months, I bought a removable changing pad topper (around $40) that sits on top of our regular dresser. The dresser was something we already owned, so we saved both money and floor space.
I keep all diapering supplies in the top drawer directly below the changing pad. When I need wipes or diaper cream, I just pull the drawer open with one hand while keeping the other on the baby. Once we’re done with diapers, the topper comes off and we have a regular dresser that grows with our kid.
Make sure your dresser is the right height though. Ideally, the changing surface should hit between your hips and waist so you’re not bending over constantly. Our dresser is 36 inches tall and it’s perfect. Anything shorter than 32 inches will kill your back.
Use a Portable Folding Crib Like the Metro Play Yard
Traditional cribs are massive. The Metro Play Yard (about $200) folds completely flat, weighs maybe 20 pounds, and includes a bassinet attachment for newborns. I move it between our bedroom and the nursery depending on nap schedules, which is impossible with a standard crib.
The footprint is smaller too. While standard cribs measure around 28 x 52 inches, the Metro Play Yard is slightly more compact and doesn’t have the visual bulk of wooden slats and posts. It looks more modern and less furniture-y, which helps in a small space that doubles as a guest room.
The honest negative? It’s not as sturdy as a traditional crib. If you have a climber or an older toddler, they might be able to tip it. We transitioned to a floor bed around 18 months. But for the infant stage in a truly tiny nursery, this saved us so much space.
Organize Dresser Drawers by Function and Frequency

I structure our dresser like a hierarchy of needs. Top drawer: everything I grab constantly during diaper changes. Diaper cream, wipes in a dispenser, burp cloths, and a backup outfit. Middle drawers: current-size clothes organized by type using file folding. Bottom drawer: seasonal items and next-size clothes that I’m not touching for weeks.
Most people get this wrong by organizing clothes by type across all drawers. Then you’re opening multiple drawers for a single outfit change. My system means I open one drawer for daily needs and occasionally dip into the others. It’s faster and keeps frequently-used items at the most accessible height.
I use drawer dividers (the bamboo expandable ones from Amazon are like $25 for a set) to create sections within each drawer. In the top drawer, I have one section for diapering supplies, one for burp cloths, and one for backup pacifiers. Everything has a home.

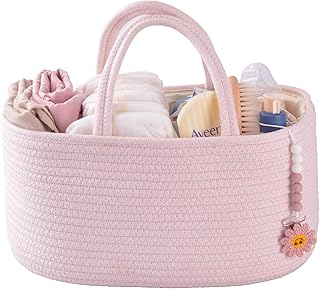
Modanais Baby Diaper Caddy Organizer Cart
Honestly, Modanais Baby Diaper Caddy Organizer Cart – 3 Tier Rolling Storage Car surprised me — sturdier than it looks in the photos, and over 303 buyers gave it 4.5 stars.
Install Closet Dividers with Age-Based Partitions

Physical closet dividers transformed our chaotic hanging section into something actually navigable. I bought a set of labeled dividers on Etsy (around $30 for 8 dividers) marked with sizes: Newborn, 0-3M, 3-6M, 6-9M, and so on. Now when someone gives us hand-me-downs, I immediately sort them into the right section.
This prevents the common mistake of mixing sizes, which makes everything look overwhelming. When clothes are properly divided, I can see at a glance what we have too much of versus what we need. It also makes rotating sizes incredibly easy. Once my baby outgrows 3-6M, I remove everything in that section at once.
The trick is keeping hangers consistent. I use all white baby hangers from IKEA (like $3 for 10) because mismatched hangers create visual chaos that defeats the purpose. It sounds picky, but uniform hangers genuinely make the closet look less cluttered even when it’s full.
Create a DIY Pegboard for Supplies Near the Changing Station

I installed a 24 x 36 inch pegboard (about $20 from Home Depot) on the wall next to our dresser-changing station. I added pegs, small baskets, and S-hooks to hold diapers, wipes, diaper cream, a small basket of hair accessories, and even a few small toys for distraction during changes.
Pegboards have more personality than plain shelving and they’re actually easier to install. You just need to mount it to studs or use heavy-duty anchors. The customization is the best part. As needs change, I move hooks and baskets around without any tools. When we’re done with diapers, I’ll repurpose it for hair accessories and jewelry.
Pro tip: paint the pegboard before installing it. I used white to match our walls, but I’ve seen gorgeous pegboards in sage green or dusty pink that become a design feature rather than just functional storage.
Use Stackable Bins for Small Accessories

Small items like pacifiers, socks, hats, and bibs create so much visual clutter when they’re loose on shelves. I use stackable bins (the clear acrylic ones from Target, about $8 each) to contain everything. One bin for pacifiers and teethers, one for socks, one for hats and headbands, one for bibs.
The stackable design is key in small spaces. Instead of spreading four bins across a shelf, I stack them vertically and use maybe 12 inches of shelf space total. I can still see contents through the clear sides, so I’m not constantly opening bins to find what I need.
I keep these bins on the middle shelf of our bookcase, right at eye level. Everything is within arm’s reach but contained. Before I started using bins, we had random socks and pacifiers scattered across three different surfaces. Now everything has a specific home.

Modanais Baby Diaper Caddy Organizer Cart
Modanais Baby Diaper Caddy Organizer Cart – 3 Tier Rolling Cart with D has been one of the most consistently praised picks in this category. 613 reviewers averaged 4.5/5.
Install Over-the-Door Organizers for Bibs and Changing Pads

This is such an overlooked storage opportunity. I hung a clear over-the-door shoe organizer (around $15 from Amazon) on the inside of our nursery closet door. Each pocket holds different items: bibs in one row, burp cloths in another, backup changing pad covers, small toys, even diaper cream samples.
The genius is that this storage uses literally zero floor or wall space. The door was just hanging there doing nothing. Now it provides storage for probably 30+ small items that would otherwise clutter up drawers or shelves. I can see everything at a glance when I open the closet.
Common mistake: buying the fabric organizers instead of clear ones. You want to see contents without having to feel around in each pocket. The clear vinyl organizers are slightly more expensive but infinitely more functional.
Add Extra Hanging Rods and Shoe Risers to Your Closet

I installed a second hanging rod about 3 feet below our main closet rod using a tension rod (about $12). This doubles our hanging capacity without any permanent installation. The top rod holds larger items like sleep sacks and jackets, while the bottom rod is perfect for onesies and pants.
Shoe risers are another game-changer. These little metal or plastic shelves (around $20 for a set of 4) let you stack shoes or small bins vertically instead of side-by-side. I use them on our closet floor to organize baby shoes and keep them visible. Before risers, shoes ended up in a jumbled pile.
The aesthetic detail that matters: keep all hangers the same style and color. I use slim velvet hangers in gray (about $20 for 50 on Amazon) because they prevent clothes from slipping and they look cohesive. Mismatched hangers make even an organized closet look chaotic.
Implement a Toy Rotation System with Clear Labeling

Here’s what I wish someone had told me: you don’t need all the toys accessible all the time. I keep 3-4 bins of toys in the nursery and rotate them monthly. The rest live in our hall closet in labeled bins organized by type: blocks, soft toys, musical toys, books.
This prevents toy overload, which is a huge problem in small nurseries. Too many toys create visual chaos and actually overwhelm babies. With fewer options available, my daughter plays more intentionally with what’s out. Plus, when I rotate bins, it’s like Christmas morning. She rediscovers toys she forgot about.
I use fabric bins from Target (about $15 each) with chalkboard labels. The bins themselves are part of the décor, sitting on our bottom bookshelf where my daughter can reach them. The rotation bins in the closet are clearly labeled so I know what’s in each one without digging.

Color Noise Sound Machines with 10 Colors Night Light 25
Honestly, Color Noise Sound Machines with 10 Colors Night Light 25 Soothing Soun surprised me — sturdier than it looks in the photos, and over 111 buyers gave it 4.5 stars.
Invest in Multi-Functional Furniture with Built-In Storage

Multi-functional furniture is trending hard in 2026, and for good reason. Our glider has a storage ottoman underneath where I keep extra blankets and burp cloths. I’ve seen cribs with built-in drawers underneath (around $400-600) that eliminate the need for a separate dresser in truly tiny rooms.
The key is thinking about furniture that serves at least two purposes. A storage ottoman works as seating plus storage. A dresser with a changing topper is both changing table and clothes storage. A bookshelf room divider creates separation while providing storage on both sides.
This approach costs more upfront but saves money long-term because you’re buying fewer pieces. Plus, multi-functional furniture typically has a longer useful life. Our storage ottoman will move to the living room once we’re done with the nursery phase.
Maximize Under-Crib Storage with Low-Profile Bins
The space under the crib is prime real estate that most people waste. I use two flat storage bins (about 6 inches tall, $25 each from The Container Store) that slide under our crib on wheels. One holds extra blankets and sheets, the other has out-of-season clothes and backup supplies.
The low-profile design is crucial. Regular storage bins are too tall to fit under most cribs, which typically have 6-8 inches of clearance. These flat bins maximize that space while keeping everything accessible. I can pull them out with one hand to grab what I need.
Pro tip: measure your crib clearance before buying bins. Some cribs sit lower than others. Also, wheels or handles make a huge difference. You don’t want to be lying on the floor fishing for a bin that’s pushed too far back.
Incorporate Biophilic Design with Functional Storage

Biophilic design is huge in 2026 nursery trends, and it pairs perfectly with organization. I use woven seagrass baskets (around $20-40 each from West Elm) instead of plastic bins because they look beautiful while providing storage. Natural wood shelving, rattan organizers, and bamboo drawer dividers create a calming environment.
This isn’t just about aesthetics. Studies show that natural materials and textures create calmer, more peaceful spaces for babies. Our nursery has wood shelving, woven baskets, a jute rug, and even a small potted plant (fake, because I kill everything) on the top shelf. It feels less like a storage unit and more like a nurturing space.
The functional benefit is that these natural storage solutions are often more durable than plastic alternatives. My seagrass baskets have held up for two years and still look great. They’ll transition easily into other rooms as my daughter grows.
Baby Diaper Caddy Organizer for Girl Boy Rope Nursery
Baby Diaper Caddy Organizer for Girl Boy Rope Nursery Storage Bin Bask punches above its price — 21 buyers rated it 4.5 stars. I would buy it again.
Create a Command Center with a Small Wall Calendar and Hooks

I mounted a small wall calendar (the dry-erase kind, about $15) next to our nursery door along with three command hooks. The calendar tracks doctor appointments, vaccination schedules, and developmental milestones. The hooks hold our diaper bag, a tote with library books, and my daughter’s jacket.
This mini command center keeps everything we need for leaving the house in one spot. Before I set this up, we were constantly hunting for the diaper bag or forgetting about pediatrician appointments. Now it’s all visible in one glance as we’re heading out the door.
The common mistake is making your command center too complicated. You don’t need elaborate systems with multiple clipboards and filing systems. Just a calendar and a few hooks handle 90% of what you need. Keep it simple or you won’t maintain it.
Use Tension Rods to Create Vertical Dividers in Deep Drawers
Deep drawers are both a blessing and a curse. They hold a lot but everything ends up in a jumbled pile. I installed tension rods (the spring-loaded curtain rods, about $8 each) vertically in our deep dresser drawer to create dividers. Now I have separate sections for different clothing types.
This works because tension rods require zero tools or permanent installation. You just twist them to the right length and wedge them in place. I have three rods in our deepest drawer creating four sections: pants, onesies, sleepers, and swaddles. Everything stays separated even when I’m rummaging through at 2am.
You can also use tension rods horizontally to create two levels in a deep drawer. Install the rod about halfway down, then place a piece of thin plywood or cardboard on top. Now you have a top and bottom level in the same drawer.
Designate a Specific Spot for Outgrown Items

This sounds obvious but it’s a game-changer. I keep a large canvas bag (about $20 from IKEA) in the bottom of our closet specifically for clothes my daughter has outgrown. The moment something doesn’t fit, it goes directly into that bag. No piles on the floor, no “I’ll deal with it later.”
Once the bag is full, I sort everything. Some items go to friends, some get donated, some get stored if we’re planning another baby. But the key is having that designated collection spot so outgrown clothes don’t mix with current clothes and create confusion.
I do the same thing with toys. A small bin in our hall closet collects toys she’s outgrown or lost interest in. Every few months I sort through it. This prevents the nursery from becoming a museum of every toy she’s ever received.
Install a Narrow Rolling Cart for Nighttime Essentials

I bought a narrow three-tier rolling cart (the IKEA RÅSKOG cart, about $30) that lives next to our glider. The top tier holds my water bottle and phone charger. Middle tier has nighttime diapers, wipes, and diaper cream. Bottom tier has burp cloths, a backup pacifier, and a small lamp.
The wheels are crucial because I can roll it wherever I need it. Sometimes I pull it next to the crib for middle-of-the-night changes. Sometimes it sits by the glider for feeding sessions. It’s way more flexible than a fixed side table and holds significantly more.
These carts come in tons of colors. I got white to match our nursery, but they make them in black, gray, pink, green, and more. The narrow footprint (about 14 inches wide) means it fits in tight spaces where a regular table wouldn’t work.
Label Everything with a Label Maker

I resisted this for months because it felt excessive. Then I bought a label maker (about $25 on Amazon) and labeled every single bin, basket, drawer divider, and shelf in our nursery. It completely changed how maintainable our organization system is.
Here’s why it matters: when my husband or my mom helps with laundry or cleaning, they know exactly where everything goes. Before labels, clean clothes would end up in random drawers and I’d spend time re-sorting. Now everyone can maintain the system because it’s crystal clear where each item belongs.
I also label the backs of bins and baskets that sit on shelves. When I pull a bin down, I can see its label and know exactly what goes back in it. This prevents the drift that happens over time where bins gradually become catch-alls for random stuff.
Looking back at our tiny nursery journey, these ideas small spaces baby room organization strategies saved my sanity more than any fancy piece of furniture ever could. Start with the solutions that address your biggest pain points first. For us, that was vertical storage and the three-bin closet system. Your priorities might be totally different.
The beautiful thing about small space organization is that it forces you to be intentional. Every item has to earn its place. That intentionality creates a calmer, more functional space for both you and your baby. Save this article for when you’re ready to tackle your nursery organization, and remember that it doesn’t have to be perfect. It just has to work for your family.
Frequently Asked Questions
How can I organize a baby room in a very small space?
Focus on vertical storage with wall-mounted shelves, use multi-functional furniture like a dresser with changing topper, implement file folding in drawers to increase capacity by 30-50%, and utilize often-forgotten spaces like over-the-door organizers and under-crib storage bins.
What is the best way to organize baby clothes in a small nursery?
Use file folding (KonMari method) to maximize drawer space, implement a three-bin system labeled ‘Now,’ ‘Next Size,’ and ‘Too Small,’ and install closet dividers to separate clothes by age. Organize dresser drawers by frequency of use with daily essentials in top drawers.
How do I maximize storage in a tiny baby closet?
Install a second hanging rod using a tension rod to double capacity, add shoe risers for vertical stacking, use over-the-door organizers for small items, implement labeled dividers to separate sizes, and keep all hangers uniform to reduce visual clutter.
What furniture saves the most space in a small nursery?
A dresser with removable changing topper eliminates the need for a separate changing table, portable folding cribs like the Metro Play Yard take up less floor space, and multi-functional furniture with built-in storage serves dual purposes while reducing overall furniture count.